How to Make Huaraches
Aqua Cloud Black

Ever since the publication of Christopher McDougall’s book, Born to Run, there has been an increased interest in the simple sandals worn by the Tarahumara, which he describes in his story.

Called “huaraches,” the footwear of the Tarahumara are basic sandals created from the rubber tread of old tires and a bit of leather cord. Not to be confused with the fancy leather sandals that are also called huaraches, the sandals worn by this people group are the original minimalist running sandals. Members of the tribe are known to run incredible distances over rough terrain and gravel roads with nothing on their feet but these huarache sandals.

Granted, the Tarahumara are not the first or only people to wear similar sandals. In fact, the oldest archeological find of a shoe is many thousands of years old, was found in Fort Rock, Oregon and looks quite familiar.

Now, If you’ve read Born to Run, or otherwise heard about huarache sandals, maybe you’ve been itching to get your hands on a pair of your own minimalist running sandals. There are two ways you can do so.

For the less adventuresome, Xero Shoes has created barefoot sandals that recreate the minimalist experience of the original huarache sandals. Find yours here.

For those who are up for the fun of taking on a fun do-it-yourself project, you can make your own sandals.

These instructions will give you the details you need to create your own DIY huarache sandals from scratch using our Xero Shoes Classic Kit with Vibram rubber.

Or you can make some sandals with the only outsole made specifically for barefoot running sandals (yes, you can wear them for other activities than running) – either the 4mm Connect or 6mm Contact kit with FeelTrue™ rubber outsolesClick here for instructions. (Find out more about our FeelTrue™ products here.)

And, at the end of the instructions about making huaraches, you’ll learn one way to tie huaraches. If you’re adventurous and creative, you can find other tying styles here.

You can also download a PDF of the instructions, below, by clicking here.

Things you’ll need to make huaraches:

  • Some sort of sole material. Again, we made our FeelTrue rubber to be the best combination of strength, flexibility, and barefoot feel for DIY huaraches sole material. Another good option is the material in our Classic kit, the 4mm Vibram Cherry.
  • Something to lace the sole to your feet — about 60-72″ per lace (depending on your size). You can use leather lace, hemp cord, etc. We use 5/32″ polyester cord… it’s soft, durable, colorful and provides the right amount of support (too thin can hurt, too thick gets unwieldy).
  • Piece of paper and a marker (like a Sharpie) — to trace your foot.
  • Pencil — to transfer your foot template to the sole material.
  • Strong scissors — to cut your tracing and the sole material.
  • Leather punch — to make the lacing holes in the sole (NOTE: We do not recommend using a nail or knife to make the hole. Holes made that way tend to tear). You want the holes to be the same size, or slightly smaller, than your cord. We use a 1/8″ punch for our 5/32″ cord (the hole is 1/32″ smaller that the cord). We use this Lace Hole PunchNote: Depending on the material you use, you could try drilling a hole (some Xero Shoes customers have done this with the Vibram Cherry sole).
  • Lighter or match — to seal the ends of the lace, if you’re using polyester, nylon, other woven synthetic lace material.

Step-by-step instructions for making Huaraches:

Step 1 – Trace your foot

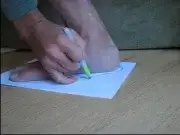
Step on a piece of paper. Lean forward and put a bit of pressure on your foot so it flattens a tiny bit. Then, using a marker (like a Sharpie) held vertically, trace around your foot. You don’t need to get every tiny nook and cranny, and you’re not trying to get an EXACT measurement of the sole of your foot… in fact, by holding the pen vertically, you’re making a trace that’s slightly bigger than your foot, and that’s exactly what you want.

Step 2 – Even out the tracing

You want to smooth out the curves. For example, you want to make the toe area into a curve, rather than bumps for each toe. Also, I extend the area on the inside of the big toe and the ball of the foot a little bit (sometimes when you run, your foot slips to the inside, so you want to add a bit of extra space here).

Step 3 – Cut out the tracing

Cut around the tracing. That is, cut on the outside of the line you’ve drawn, rather than ON the line. Again, that little extra bit can help make sure the finished product is comfy. Plus, you can always remove material from your huarache sandals and make them smaller, but you can’t make them bigger, so err on the side of too big.

Step 4 – Check your other foot

Take your cut out tracing, flip it over, and step on it with your other foot. If your other foot fits in the cutout, then you’ll use just this one template. If your other foot is significantly different (especially if it’s bigger), repeat steps 1-3 on your other foot. The beauty of making your own huarache sandals is that you can make them to fit your unique feet.

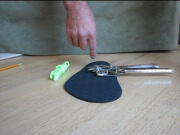
Click this picture to see a video of Steps 1-4
How to make Xero Shoes Barefoot Sandals

Step 5 – Transfer the pattern to the sole material

Place the cutout pattern(s) onto your sole material and trace around it/them with a pencil. If you only have one cutout pattern, remember to flip it over otherwise you’ll end up making 2 soles for the same foot!

Step 6 – Cut out the soles

If you’re using the 4mm Vibram material that comes with the Xero Shoes DIY huarache kit, you can use strong scissors for this. You’ll have to make small cuts towards the back of the scissors and work your way around the material.

Step 7 – Mark the toe hole

Step on your soles and, using a marker (I use the Sharpie from Step 1), put a dot between your first and second toe, right where the webbing between your toes is, and slightly closer to the second toe than right in the middle of the space between the toes.

The reason for this is, when you wear your sandals running, your foot will want to shift toward the inside. By putting the hole closer to the second toe, your foot stays in place better.

NOTE: It’s much easier to have someone else make this and the next 2 marks while you just stand on the soles.

Step 8 – Mark the inside ankle hole

Still standing on the sole, place the pen vertically, just in front of your ankle bone, and make a mark on the sole at that point.

Step 9 – Mark the outside ankle hole

Still standing on the sole, you’ll notice that there’s a place where your foot makes less contact with the ground. Make a mark on the outside edge of the sole at that point.

At this point, you should have marks for three holes.

Step 10 – Punch the holes

The size of the hole you make depends on the material you use for the laces. For example, when I use 3/16″ polypropelene/nylon for the laces, I make a 1/8″ hole. You’ll want to use a leather punch (I use either a rotary leather punch or the Lace Hole Punch we provide with Xero Shoes).

NOTE: I do not recommend using a nail or knife to make the holes. Doing so can often leave a hole that’s not clean, leading to tearing the sole. Punch out the toe hole exactly on the mark you made. For the two ankle holes, punch a hole about 1/4″ in from the edge, in line with the marks you made in steps 8 and 9.

Step 11 – Prepare the laces

Depending on your lace material, you may need to prepare the ends in order to get them through the holes. For example, if you’re using leather, you may want to cut the ends of lace into a point. If you’re using polypropelene/nylon, heat the ends with a flame and carefully (so you don’t burn yourself) seal and shape the ends to be as pointy as possible.

Step 12 – Thread the lace through the toe hole and secure it

Push one end of the lace through the toe hole, from the top to the bottom. A traditional option is to make a knot in the lace, on the bottom side. I typically use a “Figure 8 knot”, pictured here. If you’re using polypropelene/nylon or polyester lace, you’ll want to run the flame from a lighter (or match) under the knot, to melt the nylon slightly, then press the knot together to seal it and flatten it a a bit. Lately, though, I’ve replaced the knot with a lower profile “Lace Bead.”

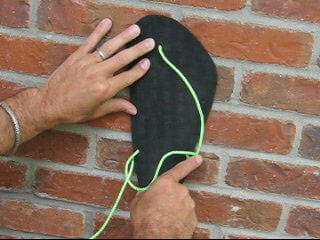
Click this picture to see a video of Steps 5-13
How to make Xero Shoes Barefoot Sandals

How to make Xero Shoes Barefoot Sandals

Step 13 – Thread the ankle holes

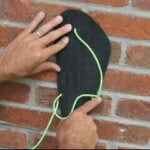
Pass the lace through the outside ankle hole first, from top to bottom. Then pass the lace through the inside ankle hole, also from top to bottom. Follow the pictures to get it correct… you want the lace to “lock in” around the holes.

Click this picture to see a video of how to tie huaraches
How to make Xero Shoes Barefoot Sandals

Step 14 – Put your foot in and tie the huaraches

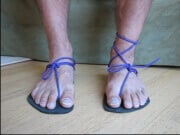
There are 2 common ways to tie huaraches running sandals. One is the more traditional “toga-style.” And the other (which I learned from “kicksock” on the Google Barefoot Running group) is more stylish and allows you to slip the huarache on and off without retying. There’s no easy way to describe the tying methods, so follow the pictures/videos.

Oh, and you may want to check out these new cool, decorative, and stylish ideas about how to tie huaraches and what to do with “leftover lace.”

The “slip-on” method from a 1st person view:
How to make Xero Shoes Barefoot Sandals

Step 15 – Go out and ENJOY your new huaraches!

Remember, though, to take it easy at first. If you’re not used to going barefoot, especially running barefoot, you’ll be putting more stress on your muscles and skin than you’re used to. Work your way into your huaraches slowly. And if you come up with cool, new tying ideas, put them on our Tying Page.

Quick Questions and Answers

I have found I often get a couple of questions when I’m talking about DIY huarache sandals. Maybe they’re your questions, too.

Can you really run in huaraches?


I get it. We’re used to running in shoes with thick soles and lots of padding. But yes, you can absolutely run in huaraches and I do all the time as do many tens of thousands of Xero Shoes customers.

Remember, these aren’t flip flops. Unlike a casual sandal, huaraches fit snugly and securely to your feet.

It is important to realize, however, that you are going to need to learn to run differently. One of the things Christopher McDougal talks about in his book (which I mentioned at the beginning of this post) is the relationship between footwear and running style.

If you want to know more, I have written a post that tells you everything you need to know about how to run barefoot or in minimalist shoes like huaraches.

I like the idea of minimalist footwear. Is there something with a bit more to protect my foot?

After making your own DIY minimalist sandals, you may wonder if there are more minimalist shoe options out there. Absolutely.

Huraches are associated with the barefoot style of walking or running that emphasizes minimal footwear that allows your feet to move and function naturally. Barefoot sandals, of which huaraches are an example, are just one type of footwear available.

You can also wear barefoot shoes or even a pair of barefoot boots. Xero Shoes has models designed for running as well as walking & hiking. They are perfect for wet or cold weather or any time you just want a bit more coverage or protection.

You can check out our entire collection here.

How To Make Huaraches

These instructions will help you make you your own huaraches from scratch using our Xero Shoes Classic Kit with Vibram rubber. If you’ve purchased  either the 4mm Connect or 6mm Contact kit with FeelTrue™ rubber outsoles — the only outsole made specifically for barefoot running sandals — click here for instructions. (Find out more about our FeelTrue™ products here) And, at the end of the instructions you’ll learn how to tie huaraches. You can also download a PDF of these instructions by clicking here.

Things you’ll need to make huaraches:

  • Some sort of sole material. Again, we made our FeelTrue rubber to be the best combination of strength, flexibility, and barefoot feel. Another good option is the material in our Classic kit, the 4mm Vibram Cherry.
  • Something to lace the sole to your feet — about 60-72″ per lace (depending on your size). You can use leather lace, hemp cord, etc. We use 5/32″ polyester cord… it’s soft, durable, colorful and provides the right amount of support (too thin can hurt, too thick gets unwieldy).
  • Piece of paper and a marker (like a Sharpie) — to trace your foot.
  • Pencil — to transfer your foot template to the sole material.
  • Strong scissors — to cut your tracing and the sole material.
  • Leather punch — to make the lacing holes in the sole (NOTE: We do not recommend using a nail or knife to make the hole. Holes made that way tend to tear). You want the holes to be the same size, or slightly smaller, than your cord. We use a 1/8″ punch for our 5/32″ cord (the hole is 1/32″ smaller that the cord). We use this Lace Hole Punch. Note: Depending on the material you use, you could try drilling a hole (some Xero Shoes customers have done this with the Vibram Cherry sole).
  • Lighter or match — to seal the ends of the lace, if you’re using polyester, nylon, other woven synthetic lace material.

Step-by-step instructions for making Huaraches:

Step 1 – Trace your foot

Step on a piece of paper. Lean forward and put a bit of pressure on your foot so it flattens a tiny bit. Then, using a marker (like a Sharpie) held vertically, trace around your foot. You don’t need to get every tiny nook and cranny, and you’re not trying to get an EXACT measurement of the sole of your foot… in fact, by holding the pen vertically, you’re making a trace that’s slightly bigger than your foot, and that’s exactly what you want.

Click this picture to see a video of Steps 1-4

Step 2 – Even out the tracing

You want to smooth out the curves. For example, you want to make the toe area into a curve, rather than bumps for each toe. Also, I extend the area on the inside of the big toe and the ball of the foot a little bit (sometimes when you run, your foot slips to the inside, so you want to add a bit of extra space here)

Step 3 – Cut out the tracing

Cut around the tracing. That is, cut on the outside of the line you’ve drawn, rather than ON the line. Again, that little extra bit can help. Plus, you can always cut your huaraches and make them smaller, but you can’t make them bigger, so err on the side of too big.

Step 4 – Check your other foot

Take your cut out tracing, flip it over, and step on it with your other foot. If your other foot fits in the cutout, then you’ll use just this one template. If your other foot is significantly different (especially if it’s bigger), repeat steps 1-3 on your other foot.

Step 5 – Transfer the pattern to the sole material

Place the cutout pattern(s) onto your sole material and trace around it/them with a pencil. If you only have one cutout pattern, remember to flip it over otherwise you’ll end up making 2 soles for the same foot!

Click this picture to see a video of Steps 5-13


Step 6 – Cut out the soles

If you’re using the 4mm Vibram material that comes with the Xero Shoe huarache kit, you can use a strong scissors for this. You’ll have to make small cuts with the back of the scissors and work your way around the material.

Step 7 – Mark the toe hole

Step on your soles and, using a marker (I use the Sharpie from Step 1), put a dot between your 1st and 2nd toe, right where the webbing between your toes is, and slightly closer to the 2nd toe than right in the middle of the space between the toes. The reason for this is, as you run, your foot will want to shift toward the inside. By putting the hole closer to the 2nd toe, your foot stays in place better. NOTE: It’s much easier to have someone else make this and the next 2 marks while you just stand on the soles.

Step 8 – Mark the inside ankle hole

Still standing on the sole, place the pen vertically, just in front of your ankle bone, and make a mark on the sole at that point.

Step 9 – Mark the outside ankle hole

Still standing on the sole, you’ll notice that there’s a place where your foot makes less contact with the ground. Make a mark on the outside edge of the sole at that point.

Step 10 – Punch the holes

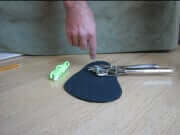
The size of the hole you make depends on the material you use for the laces. For example, when I use 3/16″ polypropelene/nylon for the laces, I make a 1/8″ hole. You’ll want to use a leather punch (I use either a rotary leather punch or the Lace Hole Punch we provide with Xero Shoes). NOTE: I do not recommend using a nail or knife to make the holes. Doing so can often leave a hole that’s not clean, leading to tearing the sole. Punch out the toe hole exactly on the mark you made. For the two ankle holes, punch a hole about 1/4″ in from the edge, in line with the marks you made in Step 8 and 9.

Step 11 – Prepare the laces

Depending on your lace material, you may need to prepare the ends in order to get them through the holes. For example, if you’re using leather, you may want to cut the ends of lace into a point. If you’re using polypropelene/nylon, heat the ends with a flame and carefully (so you don’t burn yourself) seal and shape the ends to be as pointy as possible.

Step 12 – Thread the lace through the toe hole and secure it

Push one end of the lace through the toe hole, from the top to the bottom. A traditional option is to make a knot in the lace, on the bottom side. I typically use a “Figure 8 knot”, pictured here. If you’re using polypropelene/nylon or polyester lace, you’ll want to run the flame from a lighter (or match) under the knot, to melt the nylon slightly, then press the knot together to seal it and flatten it a a bit. Lately, though, I’ve replaced the knot with a lower profile “Lace Bead.”

Step 13 – Thread the ankle holes

Pass the lace through the outside ankle hole first, from top to bottom. Then pass the lace through the inside ankle hole, also from top to bottom. Follow the pictures to get it correct… you want the lace to “lock in” around the holes.

Step 14 – Put your foot in and tie the huaraches

There are 2 common ways to tie huaraches running sandals. One is the more traditional “toga-style.” And the other (which I learned from “kicksock” on the Google Barefoot Running group) is more stylish and allows you to slip the huarache on and off without retying. There’s no easy way to describe the tying methods, so follow the pictures/videos. Oh, and you may want to check out these new cool, decorative, and stylish ideas about how to tie huaraches and what to do with “leftover lace”

Click this picture to see a video of how to tie huaraches


The “slip-on” method from a 1st person view:


Step 15 – Go out and ENJOY your new huaraches!

Remember, though, to take it easy at first. If you’re not used to going barefoot, especially running barefoot, you’ll be putting more stress on your muscles and skin than you’re used to. Work your way into your huaraches slowly. And if you come up with cool, new tying ideas, put them on our Tying Page
These instructions will help you make you your own huaraches from scratch using our Xero Shoes Classic Kit with Vibram rubber. If you’ve purchased  either the 4mm Connect or 6mm Contact kit with FeelTrue™ rubber outsoles — the only outsole made specifically for barefoot running sandals — click here for instructions. (Find out more about our FeelTrue™ products here) And, at the end of the instructions you’ll learn how to tie huaraches. You can also download a PDF of these instructions by clicking here.

Things you’ll need to make huaraches:

  • Some sort of sole material. Again, we made our FeelTrue rubber to be the best combination of strength, flexibility, and barefoot feel. Another good option is the material in our Classic kit, the 4mm Vibram Cherry.
  • Something to lace the sole to your feet — about 60-72″ per lace (depending on your size). You can use leather lace, hemp cord, etc. We use 5/32″ polyester cord… it’s soft, durable, colorful and provides the right amount of support (too thin can hurt, too thick gets unwieldy).
  • Piece of paper and a marker (like a Sharpie) — to trace your foot.
  • Pencil — to transfer your foot template to the sole material.
  • Strong scissors — to cut your tracing and the sole material.
  • Leather punch — to make the lacing holes in the sole (NOTE: We do not recommend using a nail or knife to make the hole. Holes made that way tend to tear). You want the holes to be the same size, or slightly smaller, than your cord. We use a 1/8″ punch for our 5/32″ cord (the hole is 1/32″ smaller that the cord). We use this Lace Hole Punch. Note: Depending on the material you use, you could try drilling a hole (some Xero Shoes customers have done this with the Vibram Cherry sole).
  • Lighter or match — to seal the ends of the lace, if you’re using polyester, nylon, other woven synthetic lace material.

Step-by-step instructions for making Huaraches:

Step 1 – Trace your foot

Step on a piece of paper. Lean forward and put a bit of pressure on your foot so it flattens a tiny bit.

Then, using a marker (like a Sharpie) held vertically, trace around your foot.

You don’t need to get every tiny nook and cranny, and you’re not trying to get an EXACT measurement of the sole of your foot… in fact, by holding the pen vertically, you’re making a trace that’s slightly bigger than your foot, and that’s exactly what you want.

Step 2 – Even out the tracing

You want to smooth out the curves. For example, you want to make the toe area into a curve, rather than bumps for each toe.

Also, I extend the area on the inside of the big toe and the ball of the foot a little bit (sometimes when you run, your foot slips to the inside, so you want to add a bit of extra space here)

Step 3 – Cut out the tracing

Cut around the tracing. That is, cut on the outside of the line you’ve drawn, rather than ON the line. Again, that little extra bit can help. Plus, you can always cut your huaraches and make them smaller, but you can’t make them bigger, so err on the side of too big.

Step 4 – Check your other foot

Take your cut out tracing, flip it over, and step on it with your other foot.

If your other foot fits in the cutout, then you’ll use just this one template. If your other foot is significantly different (especially if it’s bigger), repeat steps 1-3 on your other foot.

Click this picture to see a video of Steps 1-4
How to make Xero Shoes Barefoot Sandals

Step 5 – Transfer the pattern to the sole material

Place the cutout pattern(s) onto your sole material and trace around it/them with a pencil. If you only have one cutout pattern, remember to flip it over otherwise you’ll end up making 2 soles for the same foot!

Step 6 – Cut out the soles

If you’re using the 4mm Vibram material that comes with the Xero Shoe huarache kit, you can use a strong scissors for this. You’ll have to make small cuts with the back of the scissors and work your way around the material.

Step 7 – Mark the toe hole

Step on your soles and, using a marker (I use the Sharpie from Step 1), put a dot between your 1st and 2nd toe, right where the webbing between your toes is, and slightly closer to the 2nd toe than right in the middle of the space between the toes. The reason for this is, as you run, your foot will want to shift toward the inside. By putting the hole closer to the 2nd toe, your foot stays in place better. NOTE: It’s much easier to have someone else make this and the next 2 marks while you just stand on the soles.

Step 8 – Mark the inside ankle hole

Still standing on the sole, place the pen vertically, just in front of your ankle bone, and make a mark on the sole at that point.

Step 9 – Mark the outside ankle hole

Still standing on the sole, you’ll notice that there’s a place where your foot makes less contact with the ground. Make a mark on the outside edge of the sole at that point.

Step 10 – Punch the holes

The size of the hole you make depends on the material you use for the laces. For example, when I use 3/16″ polypropelene/nylon for the laces, I make a 1/8″ hole. You’ll want to use a leather punch (I use either a rotary leather punch or the Lace Hole Punch we provide with Xero Shoes). NOTE: I do not recommend using a nail or knife to make the holes. Doing so can often leave a hole that’s not clean, leading to tearing the sole. Punch out the toe hole exactly on the mark you made. For the two ankle holes, punch a hole about 1/4″ in from the edge, in line with the marks you made in Step 8 and 9.

Step 11 – Prepare the laces

Depending on your lace material, you may need to prepare the ends in order to get them through the holes. For example, if you’re using leather, you may want to cut the ends of lace into a point. If you’re using polypropelene/nylon, heat the ends with a flame and carefully (so you don’t burn yourself) seal and shape the ends to be as pointy as possible.

Step 12 – Thread the lace through the toe hole and secure it

Push one end of the lace through the toe hole, from the top to the bottom.
A traditional option is to make a knot in the lace, on the bottom side.
I typically use a “Figure 8 knot”, pictured here.
If you’re using polypropelene/nylon or polyester lace, you’ll want to run the flame from a lighter (or match) under the knot, to melt the nylon slightly, then press the knot together to seal it and flatten it a a bit. Lately, though, I’ve replaced the knot with a lower profile “Lace Bead.”
Click this picture to see a video of Steps 5-13
How to make Xero Shoes Barefoot Sandals

How to make Xero Shoes Barefoot Sandals

Step 13 – Thread the ankle holes

Pass the lace through the outside ankle hole first, from top to bottom. Then pass the lace through the inside ankle hole, also from top to bottom. Follow the pictures to get it correct… you want the lace to “lock in” around the holes.
Click this picture to see a video of how to tie huaraches
How to make Xero Shoes Barefoot Sandals

Step 14 – Put your foot in and tie the huaraches

There are 2 common ways to tie huaraches running sandals. One is the more traditional “toga-style.” And the other (which I learned from “kicksock” on the Google Barefoot Running group) is more stylish and allows you to slip the huarache on and off without retying. There’s no easy way to describe the tying methods, so follow the pictures/videos. Oh, and you may want to check out these new cool, decorative, and stylish ideas about how to tie huaraches and what to do with “leftover lace”
The “slip-on” method from a 1st person view:
How to make Xero Shoes Barefoot Sandals

Step 15 – Go out and ENJOY your new huaraches!

Remember, though, to take it easy at first. If you’re not used to going barefoot, especially running barefoot, you’ll be putting more stress on your muscles and skin than you’re used to. Work your way into your huaraches slowly. And if you come up with cool, new tying ideas, put them on our Tying Page
Auqua Cloud Black

Ever since the publication of Christopher McDougall’s book, Born to Run, there has been an increased interest in the simple sandals worn by the Tarahumara, which he describes in his story.

Called “huaraches,” the footwear of the Tarahumara are basic sandals created from the rubber tread of old tires and a bit of leather cord. Not to be confused with the fancy leather sandals that are also called huaraches, the sandals worn by this people group are the original minimalist running sandals. Members of the tribe are known to run incredible distances over rough terrain and gravel roads with nothing on their feet but these huarache sandals.

Granted, the Tarahumara are not the first or only people to wear similar sandals. In fact, the oldest archeological find of a shoe is many thousands of years old, was found in Fort Rock, Oregon and looks quite familiar.

Now, If you’ve read Born to Run, or otherwise heard about huarache sandals, maybe you’ve been itching to get your hands on a pair of your own minimalist running sandals. There are two ways you can do so.

For the less adventuresome, Xero Shoes has created barefoot sandals that recreate the minimalist experience of the original huarache sandals. Find yours here.

For those who are up for the fun of taking on a fun do-it-yourself project, you can make your own sandals.

These instructions will give you the details you need to create your own DIY huarache sandals from scratch using our Xero Shoes Classic Kit with Vibram rubber.

Or you can make some sandals with the only outsole made specifically for barefoot running sandals (yes, you can wear them for other activities than running) – either the 4mm Connect or 6mm Contact kit with FeelTrue™ rubber outsolesClick here for instructions. (Find out more about our FeelTrue™ products here.)

And, at the end of the instructions about making huaraches, you’ll learn one way to tie huaraches. If you’re adventurous and creative, you can find other tying styles here.

You can also download a PDF of the instructions, below, by clicking here.

Things you’ll need to make huaraches:

  • Some sort of sole material. Again, we made our FeelTrue rubber to be the best combination of strength, flexibility, and barefoot feel for DIY huaraches sole material. Another good option is the material in our Classic kit, the 4mm Vibram Cherry.
  • Something to lace the sole to your feet — about 60-72″ per lace (depending on your size). You can use leather lace, hemp cord, etc. We use 5/32″ polyester cord… it’s soft, durable, colorful and provides the right amount of support (too thin can hurt, too thick gets unwieldy).
  • Piece of paper and a marker (like a Sharpie) — to trace your foot.
  • Pencil — to transfer your foot template to the sole material.
  • Strong scissors — to cut your tracing and the sole material.
  • Leather punch — to make the lacing holes in the sole (NOTE: We do not recommend using a nail or knife to make the hole. Holes made that way tend to tear). You want the holes to be the same size, or slightly smaller, than your cord. We use a 1/8″ punch for our 5/32″ cord (the hole is 1/32″ smaller that the cord). We use this Lace Hole PunchNote: Depending on the material you use, you could try drilling a hole (some Xero Shoes customers have done this with the Vibram Cherry sole).
  • Lighter or match — to seal the ends of the lace, if you’re using polyester, nylon, other woven synthetic lace material.


Step-by-step instructions for making DIY Huarache Sandals:

Step 1 – Trace your foot

Step on a piece of paper. Lean forward and put a bit of pressure on your foot so it flattens a tiny bit. Then, using a marker (like a Sharpie) held vertically, trace around your foot. You don’t need to get every tiny nook and cranny, and you’re not trying to get an EXACT measurement of the sole of your foot… in fact, by holding the pen vertically, you’re making a trace that’s slightly bigger than your foot, and that’s exactly what you want.

Step 2 – Even out the tracing

You want to smooth out the curves. For example, you want to make the toe area into a curve, rather than bumps for each toe. Also, I extend the area on the inside of the big toe and the ball of the foot a little bit (sometimes when you run, your foot slips to the inside, so you want to add a bit of extra space here).

Step 3 – Cut out the tracing

Cut around the tracing. That is, cut on the outside of the line you’ve drawn, rather than ON the line. Again, that little extra bit can help make sure the finished product is comfy. Plus, you can always remove material from your huarache sandals and make them smaller, but you can’t make them bigger, so err on the side of too big.

Step 4 – Check your other foot

Take your cut out tracing, flip it over, and step on it with your other foot. If your other foot fits in the cutout, then you’ll use just this one template. If your other foot is significantly different (especially if it’s bigger), repeat steps 1-3 on your other foot. The beauty of making your own huarache sandals is that you can make them to fit your unique feet.

Click this picture to see a video of Steps 1-4
How to make Xero Shoes Barefoot Sandals

Step 5 – Transfer the pattern to the sole material

Place the cutout pattern(s) onto your sole material and trace around it/them with a pencil. If you only have one cutout pattern, remember to flip it over otherwise you’ll end up making 2 soles for the same foot!

Step 6 – Cut out the soles

If you’re using the 4mm Vibram material that comes with the Xero Shoes DIY huarache kit, you can use strong scissors for this. You’ll have to make small cuts towards the back of the scissors and work your way around the material.

Step 7 – Mark the toe hole

Step on your soles and, using a marker (I use the Sharpie from Step 1), put a dot between your first and second toe, right where the webbing between your toes is, and slightly closer to the second toe than right in the middle of the space between the toes.

The reason for this is, when you wear your sandals running, your foot will want to shift toward the inside. By putting the hole closer to the second toe, your foot stays in place better.

NOTE: It’s much easier to have someone else make this and the next 2 marks while you just stand on the soles.

Step 8 – Mark the inside ankle hole

Still standing on the sole, place the pen vertically, just in front of your ankle bone, and make a mark on the sole at that point.

Step 9 – Mark the outside ankle hole

Still standing on the sole, you’ll notice that there’s a place where your foot makes less contact with the ground. Make a mark on the outside edge of the sole at that point.

At this point, you should have marks for three holes.

Step 10 – Punch the holes

The size of the hole you make depends on the material you use for the laces. For example, when I use 3/16″ polypropelene/nylon for the laces, I make a 1/8″ hole. You’ll want to use a leather punch (I use either a rotary leather punch or the Lace Hole Punch we provide with Xero Shoes).

NOTE: I do not recommend using a nail or knife to make the holes. Doing so can often leave a hole that’s not clean, leading to tearing the sole. Punch out the toe hole exactly on the mark you made. For the two ankle holes, punch a hole about 1/4″ in from the edge, in line with the marks you made in steps 8 and 9.

Step 11 – Prepare the laces

Depending on your lace material, you may need to prepare the ends in order to get them through the holes. For example, if you’re using leather, you may want to cut the ends of lace into a point. If you’re using polypropelene/nylon, heat the ends with a flame and carefully (so you don’t burn yourself) seal and shape the ends to be as pointy as possible.

Step 12 – Thread the lace through the toe hole and secure it

Push one end of the lace through the toe hole, from the top to the bottom. A traditional option is to make a knot in the lace, on the bottom side. I typically use a “Figure 8 knot”, pictured here. If you’re using polypropelene/nylon or polyester lace, you’ll want to run the flame from a lighter (or match) under the knot, to melt the nylon slightly, then press the knot together to seal it and flatten it a a bit. Lately, though, I’ve replaced the knot with a lower profile “Lace Bead.”

Click this picture to see a video of Steps 5-13
How to make Xero Shoes Barefoot Sandals

How to make Xero Shoes Barefoot Sandals

Step 13 – Thread the ankle holes

Pass the lace through the outside ankle hole first, from top to bottom. Then pass the lace through the inside ankle hole, also from top to bottom. Follow the pictures to get it correct… you want the lace to “lock in” around the holes.

Click this picture to see a video of how to tie huaraches
How to make Xero Shoes Barefoot Sandals

Step 14 – Put your foot in and tie the huaraches

There are 2 common ways to tie huaraches running sandals. One is the more traditional “toga-style.” And the other (which I learned from “kicksock” on the Google Barefoot Running group) is more stylish and allows you to slip the huarache on and off without retying. There’s no easy way to describe the tying methods, so follow the pictures/videos.

Oh, and you may want to check out these new cool, decorative, and stylish ideas about how to tie huaraches and what to do with “leftover lace.”

The “slip-on” method from a 1st person view:
How to make Xero Shoes Barefoot Sandals

Step 15 – Go out and ENJOY your new huaraches!

Remember, though, to take it easy at first. If you’re not used to going barefoot, especially running barefoot, you’ll be putting more stress on your muscles and skin than you’re used to. Work your way into your huaraches slowly. And if you come up with cool, new tying ideas, put them on our Tying Page.

Quick Questions and Answers

I have found I often get a couple of questions when I’m talking about DIY huarache sandals. Maybe they’re your questions, too.

Can you really run in huaraches?

I get it. We’re used to running in shoes with thick soles and lots of padding. But yes, you can absolutely run in huaraches and I do all the time as do many tens of thousands of Xero Shoes customers.

Remember, these aren’t flip flops. Unlike a casual sandal, huaraches fit snugly and securely to your feet.

It is important to realize, however, that you are going to need to learn to run differently. One of the things Christopher McDougal talks about in his book (which I mentioned at the beginning of this post) is the relationship between footwear and running style.

If you want to know more, I have written a post that tells you everything you need to know about how to run barefoot or in minimalist shoes like huaraches.

I like the idea of minimalist footwear. Is there something with a bit more to protect my foot?

After making your own DIY minimalist sandals, you may wonder if there are more minimalist shoe options out there. Absolutely.

Huraches are associated with the barefoot style of walking or running that emphasizes minimal footwear that allows your feet to move and function naturally. Barefoot sandals, of which huaraches are an example, are just one type of footwear available.

You can also wear barefoot shoes or even a pair of barefoot boots. Xero Shoes has models designed for running as well as walking & hiking. They are perfect for wet or cold weather or any time you just want a bit more coverage or protection.

You can check out our entire collection here.

53 thoughts on “How To Make Huaraches

  1. i love this idea. i am a gymnast and a coach i am always barefoot at my job and everywhere i go. i am also a new barefoot runner (2yr) i have thought about making those exact type of shoes but did not know where to start. i look forward to buying your kit and making my own huaraches.
    Cheerfully
    Daniel Moretz

  2. Everything went fine putting them together. Nice and simple. Now once I order my next kit for my 2 left feet I will be able to go out and run. Don’t know how I got two rights as I flipped the pattern over. LOL oh well pay attention when tracing the pattern on the material.

    1. If I had a buck for every time I made 2 left (or right) feet… well, let’s just say I’d have a bunch of bucks.

      You could, in the meantime, wear one of your shoes “upside down” with the tread towards your foot.

  3. I just got my kids kit. I happen to have tiny feet. I just cut out mu soles. It was pretty easy and thankfully I have a left and a right foot. Now I have to find something to make the holes. I just watch the tying video and have pretty much decided I like the the slip on style. It just seems more practical and more stylish in my mind but good to know both.

    1. You can try a 1/8″ drill bit (if you don’t go out and buy a leather punch)… or you can find a leather/shoe repair shop and ask them to help. Usually they’ll just hand you a punch and say, “Do it yourself.” Sometimes they’ll charge you a dollar. (That’s what I’ve heard from some Invisible Shoe owners)

  4. Just took my first huaraches for a test run! I’ve been barefoot for about 9 months, also have Vibrams, & although I liked the Vibrams at first my feet crave to be out of them now. Unfortunately my soles are not as resilient yet as I would like them to be so need something for those slightly tougher surfaces – or if I want to be able to go longer distances. It was fun making them, still have to refine the size (trim a little off), & I may have created a variation on the toga style! (Might post a video later).

    It was very fun running this morning. My feet felt very free (no enclosures, as in Vibrams), though I was surprised to hear a flap, flap flap sound, as my BF running is silent! Anyway, look forward to huarche adventures.

    Thx for the great instructions & videos!

    1. Thanks for the report, Jan.

      One of the cool things with huaraches is that they reveal form issues that can go unnoticed when we’re barefoot. I’ve seen barefoot runners overstride, heel strike, slam the ground… all sorts of things that barefoot running *should* correct (and usually does with time). That “flapping” sound is pointing to a form issue. Namely, some combination of overstriding and/or not being soft enough with your hips/knees.

      Know that it’s possible to run in huaraches almost silently… then, next time you go for a run, wonder how that’s possible and see what changes you can make to your form to make that happen.

  5. Thanks Steven. I was “afraid” it might be something I was doing. I did 2 miles today & it seemed a little quieter. I think that I may have a little “fear” around maybe catching an edge so perhaps I’m lifting my feet a little higher to make sure I clear everything??? Anyway, thanks for the confirmation that I should be able to be almost silent. Something to work on!

    Oh, & I created a slip on next — I was surprised that it felt more comfortable & looks better on me. Love the flowers & other interesting knot styles. Gonna see what I can come up with too!

    Keeping my FB friends updated with my progress!

  6. So I’ve run now several days with them – max is 4 miles, along the Front at Venice Beach (ah, bliss). I’ve been up to 6-miles BF (on easy surface), slowly building back up to being able to do distance again. Slip-on is definitely more comfortable, still playing with style etc. I think my current tying may be a little loose as there is space between my sole & the shoe at the toe knot. I know that finding the right balance between tight enough & not too tight will be interesting. Nothing more uncomfortable on a hot day that lacing that is too tight. About to order some for my husband too! Oh, still making a slight slap sound, going uphill makes no difference. I think it might now be the looseness, rather than my placing (or not) of my feet.

    Any thoughts about how close the foot should be to the sole — touching at all times????

    Thx,

    Jan

  7. Hi Jan,

    Well, there are 3 places where noise can come from. The first two are the cause most of the time: foot placement, and how you meet the ground. It’s possible that your foot placement is still a bit off, even when you’re running uphill. Or it’s possible that you’re meeting the ground with a stiffer leg (ankle, knee, hip) than is ideal.

    It’s *possible* that you need to tighten up the toe strap a bit.

    It’s almost impossible to give a single, specific recommendation from a few lines in a blog post (unlike being live, where I could see what you’re doing in real-time).

    Oh, actually, I *can* give a one word suggestion: experiment.

    Knowing that it’s possible to run very quietly, wonder what changes you might make, try them, see what happens… repeat if necessary

  8. I received my huaraches kit yesterday! Soles are cut. I used a 1/8″ drill to make the holes (it worked really well, as long as you put a block of wood or something underneath the sole). Pictures and comments about running and tying soon!

  9. Made my first pair today. My heels tend to slip to the inside of the huaraches. Any suggestions on how to correct this?

    1. Most of the time, you get that effect if you left the heel straps too loose. The solution for that is tightening the heel straps (not so much that they push the foot forward on the sole).

      Rarely, this has to do with some way your foot meets the ground.

      I’d play with the tensions of the straps, especially the heel strap, first.

  10. i always choose running shoes made of synthetic leather because they last longer than natural leather ,,

  11. I once made a pair of huarache sandals from the insoles of a regular pair of shoes, I did the holes and everything, and I took the laces from the same shoes and put them to the insoles, and it was pretty good!! jaja, it only last like 4 or 5 days of use (and I did use them as regular footwear), but it gave me the feeling of how it would be to have some huarache sandals. I hope soon I made myself a pair, I only have VFF, but really enjoy the feeling of this “provitional improvised” sandals, looking forward to have a proper pair. cheers!

  12. Hi in response to Jan’s post I wanted to share my experience. I made my sole a lot bigger than my foot at first, fearing that I would make it to small. This was noisy for sure, there was a slap noise and i was no longer silent. Slowly I trimmed the material back on the outside of my foot, toes, and heel. Your foot does slide slightly to the inside so I left the extra there. This helped but there was still to much play on the strap between my toes. The problem was that if I tightened everything up the knot between my toes started to annoy me after a mile. So I reheated the not with a flame and hammered it to be a little flatter and less intrusive. the results are amazing. I can wear them a little tighter now without feeling the knot at all. the sandal is closer to my foot and the end result is silence. The silence is really pleasant and I know that I am not hurting my body.

  13. So I reheated the knot* with a flame and hammered it to be flatter

  14. Do you sell the recommended 5/32″ polypropylene/nylon cord? If not, will you please name your source. I have been unable to locate same online. Thanks for your help!

    1. Hi Dick…

      The lace we sell with our kits and shoes is the 5/32″ cord. We *do* sell it separately as well, but it isn’t in our shopping cart yet (it will be soon). If you want some, drop me an email — [email protected] — and let me know what you would like and I’ll tell you what the pricing is.

  15. Just ran a mile in my invisible shoes, my longest “barefoot” run yet. These sandals have quickly helped me to transition to Chi running by quickly stopping my overstriding and heel strikes. I absolutely love them. I dread the thought of winter snows, but look forward to spring.

  16. I just discovered this today by googling Tarahumara Indians. Unfortunately, in Northern Alberta, Canada, it gets cold in December and today was -25C so I wore ordinary running shoes. However, I intend to get Invisible Shoes ready for when the warm weather returns. If it ever does!

  17. Just made my first pair. My feet almost feel bare. Just ran out to my car, which in the Northeast, in January was a bit interesting @ 22F. Can’t wait to start “running” in them!

  18. Just got mine finished. Taking a little bit to get used to the laces, and the romantic in me gave way to the pragmatist and found the slip on method to work better for me than the cooler looking “toga” style. Really feels like going barefoot. Walking and running in these all day to get used to them. Will update with progress.

  19. What other materials can be substituted for the vibram bottem that will give the same feel?

    1. We haven’t found one yet that’s as good.

  20. If you have a pair of hemostats laying around they work really well to doing the lacing. Put the hemostat through the hole, grab the lace, and pull them both back through the hole. Also, EMT scissors cut the cherry vibram like butter.

    1. EMT scissors are great. And for those of us who don’t have hemostats laying around ( 😉 ), a bobby pin works too! Push the rounded end of the bobby pin through the hole, put the lace through the lace through the “eye” of the bobby pin, pull through (you may want to grab the “ends” of the bobby pin with pliers to make this easier).

  21. Hi,
    I got the kit and I’m very excited making my huaraches 🙂 but I have encountered a snag and ould love your advice.

    I’m ready to punch the holes and the instructions say to use the 1/8″ hole in the leather punch. However, the hole from the 1/8″ is so small that I can’t get the lace through it. I tested a 13/64″ hole and it works and seems to hold the lace tightly. Is it ok to use a hole this big?

    Thanks!

    1. If that works, it works.
      We use a 1/8″ all the time without a problem. One solution: A makeshift “needle threader” — take a bobby pin (or open up a paper clip so it’s just one “U” shape), push the rounded end through the hole, put the lace through the rounded end of the bobby pin, and pull the bobby pin back through the sole (easier if you use a pliers)… it’ll bring the lace with it.

  22. I just bought kits for the whole family (yeah!!!), and I having some trouble knowing how tight/loose to tie them for the kids. Should I go looser, or a more fitted. The kids can’t really tell me. They just say “it bothers me” and then I don’t know how to adjust it for them.

    Also, my in my hauraches, my left foot is fine, but I can’t seem to get my right foot correct. I feel the string pulling on my big toe towards the left (as I’m looking at it)–like the string is wanting to pull my big toe off. When I am just looking at my foot/shoe, I can see the hole right in between the toes. I have tried to re-cut the hole going more toward the other toes, and it helped some, but not completely. I have also tried adjusting the ankle holes. Not sure where to go from there.

    Thanks!

    1. Hi Heidi,

      I wish there were an answer for “how tight?” but it’s a personal preference, no matter what your age. So, I’d just start at one end or the other (tight or loose) and make adjustments from there. Ask them to point to where it bothers them… maybe that’ll help.

      Onto your situation: I’m not clear how the string on the RIGHT foot would be pulling your big to to the LEFT, since the toe strap goes from the toe hole to the *outside* ankle hole (which is to the right of your foot). Either way, it sounds like one of two issues (pretty hard to diagnose these things from an email and not a picture/video, btw):

      1. You’re too far forward on the sole (jamming your toes into the string) … if that’s the case, loosen the heel strap just enough to let you move your foot back… and then you may need to tighten the toe strap a tiny bit… or;
      2. Adjust the angle of the toe strap… you can use a combination of the tightness of the toe strap and some traction from the lace that’s coming from the INSIDE ankle hole to make the toe strap align parallel to your foot, or at an angle (e.g. loose toe strap + pull on the strap with the lace from the inside ankle hole = toe strap coming straight back from between your toes)

      (That’s the best I can offer without seeing what you’re referring to)

  23. Well, I finally have them on my feet after MUCH cursing. I had a heck of a time getting the string through the holes. I initially drilled 1/8″ holes. I managed to get one string through, but couldn’t make any of the others go through. I don’t seem to have the strength (even with pliers) to pull a bobby pin and string through. Drilled holes seem to sort of “close up” after drilling, much more so than the punched holes would. I tried drilling larger, and that didn’t help much. I finally got the strings in by putting the points of a pair of pliers through the hole, cranking the pliers open and having my daughter put the end of the string into the open pliers. I then closed the pliers and pulled it through. I’m a little worried I might have weakened the hole by stretching it so far, but I’d got to the point where it was either that or using my shoes as fuel 🙂

    1. Certain drill bits work better than others. We’ve had a number of customers who’ve had no problem drilling… but I haven’t figured out what type of bit they’re using. Ultimately, a punch is best (we have something in the works about that… more news soon).

  24. I made my first pair will an old rubber door mat, maybe only 3mm thick. It was very flimsy until I put a layer of athletic athletic tape across the top which stiffened up the sole just enough and reinforced the aweful holes I punched with a screw driver. These are the ugliest things I ever put on my feet, including all the shoes I wore in the 80’s. They’re all white and just do not look right. However, I have never had more fun running before. My next pair is in the works and will look much better.

    Oh, so far I have spent $0.00 for both pairs. Steve thanks for the website and all the awesome DIY videos. I will definitely be ordering a custom pair very soon.

  25. Steve,

    Got the kit tonight and started working on it. Before I start punching holes, I have about 1/4 – 1/8 inch rubber surrounding my foot. Is that correct?

    Thanks!

    1. That sounds about right (you can always trim down later if you feel the need). Take a look at the pictures videos, here and on the tying huaraches page, and you’ll get a sense of the proper proportions.

  26. I love my huaraches! The only thing though was the knot underneath the sandal. So I took a kitchen blowtorch and heated up the knots and press really hard on the ground so the knot flattened out. Works great! No slip outs yet. Thanks!! Probably will order the new style too.

  27. Just made my first pair of sandals, looking forward to trying them out.

  28. Where can I order the hole puncher? I saw some once, but noow cannot find them??

    1. If you don’t want to buy one, you can probably borrow one at a local shoe repair or leather repair shop. Otherwise, any hobby/craft store will have them. And you can also find one on Ebay here: Rotary Leather Punch

  29. Love the help and hints you provide! Made a pair and of course , as you might expect, it was eye opening. My wife survived cancer but lost a leg to the battle and I made her a sandal and she is loving it! No more fear of thorns as she traverses our desert home, yet she is feeling the freedom of bf mobility. Thanks to you and Phoenix for just being good citizens on this earth bro.

  30. Oh, by the way. I made a hole punch out of a slender copper tube like for water line to a cooler or something. I cut it 2 inches long and sharpened it with a file at the end and it hammers through cleanly and easily making a neat and clean hole.

    1. Great idea! (in fact, we’re working on something similar 😉 )

  31. Steve
    I believe that bike tires after you cut off the outside metal piece work better on dirt and mud and anything that’s not pavement because you have the more outstanding tread which is not comfortable to walk on pavement with but perfectly fine to run on any terrain and I think it is between 3-6mm thick if you were to cut off the tread and I think you should try this tread (bike tires) and tell me what you think.

  32. But pease don’t cut off the tread

    1. The trick with using ANY rubber is finding something that has the right combination of flexibility and thinness (for ground feel), and stiffness (so it’s not floppy), abrasion resistance (so it doesn’t wear out too quickly), tread design (for traction), and a pattern on the part that touches your foot that’ll give you some grip while still being comfortable. And the challenge of finding something with all of those characteristics is why we developed our exclusive FeelTrue™ rubber. That said, I’m all for people making huaraches out of ANYTHING they can find! Experiment. Have fun! Feel The World!

  33. Seriously though try using bike tires

  34. i used the drill to punch the holes. everything worked square— now i’m off to run. thanks y’all!

  35. Thanks for this article and for sharing! I’ve been experimenting with this design in all kinds of weather and I wanted to contribute/share some insights. Detailed photos and commentary will be posted to my blog, once it is up and running.

    I’ve made a pair of huaraches using EVA closed cell foam, 4mm and the “string” is made from an old bicycle tube. You can take the tube (made from Butyl rubber, which is very safe for skin contact) and cut it into thin strips. Next, take the strips and lace it using the slip on method.

    I like the bike tubes because they are very durable, totally water proof and can be tied a little tighter to hold the foot more snug when wet.

    Cheers,
    -Eric

  36. Just got my 6mm Contact kit and am wearing them now. I, like many others, tried to make my own out of: Old sandals, truck bed liner, tire tread, pond liner, different old sandals, etc. It is better to spend just a few dollars and get the real deal. The Feeltrue rubber is amazingly comfortable, and the tabs on the sides are a real help. When I put these on, I first thought my feet were numb, because the soles are so comfortable. Thanks, Steven, great product!

  37. On an iPad here…would be nice if if you had a gallery of just pics of finished huaraches…I can’t get to the existing pics it seems.
    Thx e

    1. We’re working on that… since the iPad doesn’t like Flash, it doesn’t like the videos 🙁

  38. I got my 6mm contact today and assembled right away. It’s great! Just one thing- why is it that your logo doesn’t appear in it. Instead, zero shoes was marked. As what what I’ve seen in your launching video, your logo invisible shoe was in it. Just curious, can you clarify? Thanks!

Leave a Reply

Your email address will not be published. Required fields are marked *