latest News
Water? Rocks? Running? Bring it on.
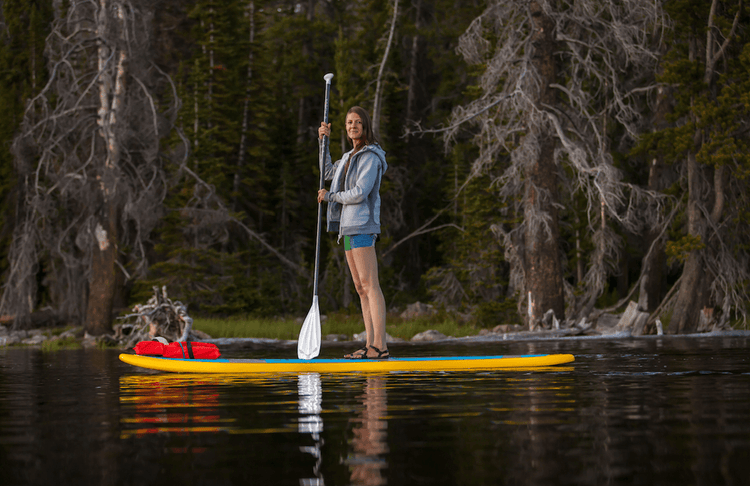
We last left you hanging wondering which model of Xero Shoe we pack along for our different adventures. We often take multiple shoes when we travel, but the Xero Z-Trek sandal always makes the cut due to its versatility, low maintenance and extreme light weight.The Z-Trek is a fantastic sandal for river and water sports. The design keeps the shoe snugly where it belongs (instead of washing out to sea) and it dries within minutes, making water-to-land transitions a non-event. We’re avid stand-up paddle boarders and have hiked our boards (SUPs) to remote waters in many parts of the world, paddling places like New Zealand, Costa Rica, South Korea, Italy, the Mississippi River, Hawaii and the U.S. Pacific Coast. Wherever we paddle, there is one commonality: You must first get to the water. Whether it’s crossing a hot parking lot covered in broken glass, a quarter mile of blistering-hot sand, or carrying our paddle boards down a large field of lava rock, our Z-Trek sandals are the perfect companion to get us to the water. Preparing to paddle the glacier lakes of Mt. Cook, New ZealandLast June, we took our SUPs on a five-day, supported run on the Green River, through Desolation and Gray Canyons. It was an 88-mile run down one of the most remote areas in the lower 48 states. We were surrounded by spectacular scenery devoid of any technology. (Especially so, because the river ate my camera phone on day one.) There were hours of stillness and quiet on the river as it meandered through the deep canyons of the Colorado Plateau, with the occasional adrenaline produced by the roar of sixty Class I-III rapids.Our tent, clothing, food and water were transported by experienced guides on small, solo, inflatable rafts. Many of the rapids had only a few safe lines to take. Some rapids only had one line– and that line changes substantially depending on the volume of water rushing down the canyon. Several times during the five-day expedition we paused upriver of the rapid and hiked out to overlook our upcoming challenge. We scrambled through hot sand and over red sandstone and rock, always watching for small cactus plants and rattle snakes. Then we’d put on our special whitewater life jackets, quick release leashes and helmets for the duration of the rapid.Our mornings were spent striking camp and then navigating downriver for a few hours. We’d break for lunch by finding a calm section of river and circling our SUPs and rafts to distribute food and swap stories. By early afternoon each day we made our campsite for the evening. Campsites are non-developed, governed by a “leave-no-trace” rules and ethos. Since they are taken on a first-come basis, we’d rise early each morning to ensure our party beat the other expeditions downriver to the next camp. Paddling the 10,000-ft lakes of the Uinta MountainsOnce camp was made, we explored the surrounding dry canyons and high desert topography. Or pass time on the river’s edge in our tents, hiding from blood-thirsty mosquitos. Occasionally we’d see another party float by on their journey to their evening camp.Paddling the Green River for five days was an amazing experience and something everyone should consider doing.This weekend we’re traveling to Moab, UT to compete in a paddle board race on a seven-mile section of the Colorado River. It’s our first race of the season. Typical of most SUP races, we have a running start into the river (while carrying our paddles and boards), paddle for about an hour and a then jump off our boards and run a short distance across a rocky shore and parking lot to the finish line. For the past few weeks we’ve debated which paddle boards to take with us; as each race board has its advantages in different conditions. But our footwear will be the Xero Z-Trek sandal – for obvious reasons: This race seems to have been designed around the functionality that we love about the Z-Trek. Water? Rocks? Running? Bring it.See pics and race results this Sunday by following us @WildAcroDuo.Until next time, Chris & Roxy
Become a Better Runner -- 3 Free Chi Running Lessons
If you want to become a better runner... or start running enjoyably, then you'll like this video introduction to Chi Running.But, more, you'll like the 3 Free Lessons you get from Danny Dreyer, creator of Chi Running, when you CLICK HERE
F Sending: Celebrating the Fun of Slacklining with Liz Thomas
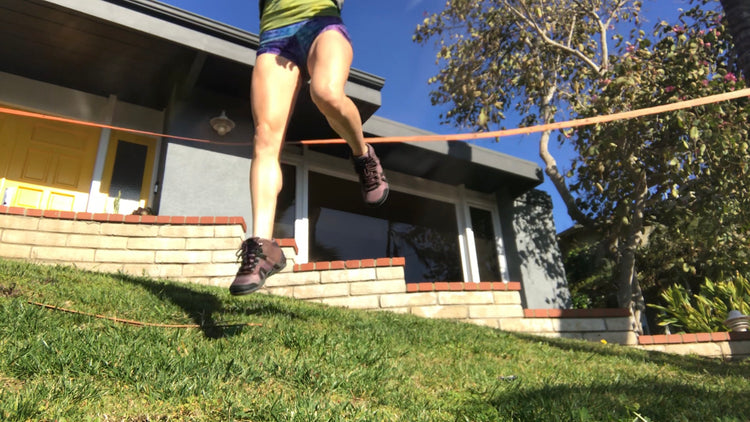
For those outside of the slacklining community, let’s start with a quick vocabulary lesson: Send: a verb known to have originated in climbing but has now spread to numerous outdoor sports such as skiing, surfing, highlining, slacklining, mountain biking, and more. In climbing to “send” means that you have climbed the climb in one go (not necessarily the first try), one continuous climb without falling or hanging on the rope. Translated into highlining terms “to send” has come to mean you have walked the whole highline from one end (the point you stand up close to an anchor) to the other end. Slacklining: the act of walking or balancing along a suspended length of flat webbing that is tensioned between two anchors Highlining: slacklining, but up higher (think slacklining above a river) I personally have been very prone to getting obsessed with “the send”. And I’ve got to say sending is great! It feels good. It is like taking a huge dopamine pill once your activity of choice is over and you have “sent it”, even if it was brutally painful to get there. But I think there is a dark side to being obsessed with sending.And that’s why I'm currently on a huge “f sending” (pardon the hidden expletive) movement while slacklining–I cannot get enough of it! I’ve been posting bits and pieces of my thoughts on the subject on Instagram and have been getting positive feedback and want to expand.The dark side, at least for me, is the pressure I put on myself to on-site. There is that classic climbing term that says it all, “on-site or die”. It’s one mentality, but not the one I chose to have anymore. I’ve found that instead of looking at the prize I was obsessed with avoiding failure to a point that is was almost inevitable. This is a little counterproductive. When I teach slacklining I tell people to not look down because they will go down. The same principle applies to your thoughts. Don’t think about falling or else you will fall.Yes I get super excited when I send that highline clean but f sending isn’t about not sending, it’s about celebrating all of the things in between. Celebrate the stands, the whippers, the gnarly line catch bruises all up and down your arms and legs! Celebrate the present! It’s all about creating a positive playful atmosphere for yourself and others by changing your outlook of success.In every sport you do remember we all started it because whatever it is we thought it was fun! Somewhere along the way we start getting better and then we get serious. It’s fun to send lines, routes, and new skills but F SENDING and remember to have fun along the way! “The best surfer is the one having the most fun.” Duke Kahanamoku “The best climber in the world is the one having the most fun.” Alex Lowe To sum things up, the road to success inevitably has failures all along the way, so I just like to remember to giggle at every single one.—Liz Thomas, highline athleteFollow Liz on Instagram to see her adventures in Xero Shoes
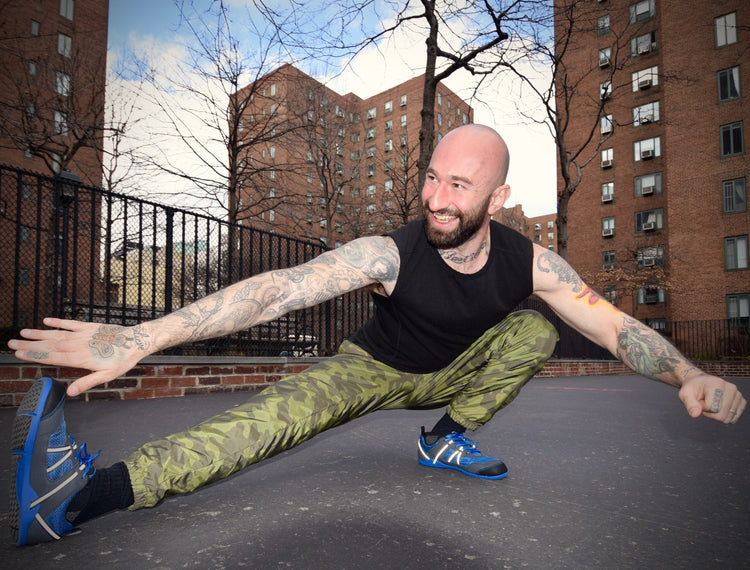
5 Calisthenics Leg Exercises to Build Strength and Muscle
This post was recently updated September 26, 2023 For most sports, leg strength can give you, well, a leg up on the competition. Even if you’re not an athlete, though, leg strength is important for health and wellness. If you like to exercise but you aren’t a gym person, you might think that running, cycling or hiking are your only options for a decent leg workout. But there is so much more you can do to strengthen your lower body without lifting weights or using machines. Here are 5 of my favorite calisthenic leg exercises for developing strong legs and glute muscles. (Wondering what calisthenic leg workouts are all about? See my note at the end of this post.) Ready to develop strong legs? Let’s go! Bodyweight Squat Walking Lunge Archer Squat One Leg Box Squat Hover Lunge Exercise 1. Bodyweight Squat This is the most fundamental strength building exercise for the legs. This classic leg squat hits all the muscles of your lower body and may be a mobility challenge for some folks as well. To perform a bodyweight squat, start with your feet hip distance apart, then reach your arms forward, bend your knees and sit back into your heels. When your hips get below knee height, return to a standing position and repeat. Working your way up to 40-50 consecutive bodyweight squats will set you up with a fantastic foundation to progress your lower body strength training. Exercise 2. Walking Lunge The walking lunge requires a bit more body awareness than the standard squat. It also introduces a balance component and is a great way to hit your leg muscles from different angles. Walking lunges are the perfect complement to bodyweight squats. Stand with your feet together, then take a big step forward with one foot and lower your back knee toward the ground, keeping your leg in a straight line, stopping just before it touches. Keeping your front foot where it is, step forward with your other leg and stand back up, alternating legs with each rep. It is a similar motion and has some of the same benefits of a split squat with a bit more challenge. Exercise 3. Archer Squat This asymmetrical squat variation is a beautiful merger of strength, flexibility, balance and control. It’s also a great way to target your inner thighs and can be an early lead-up step toward one-legged squats. Begin with a wide stance, then keep one leg straight as you squat all the way down on the opposite leg. Return to the start position and repeat on the other side. Exercise 4. One Leg Box Squat Stand facing away from a box, bench or other object that’s around knee height, then lift one leg into the air. Carefully sit back onto the box with your knees bent, then stand back up without your extended foot touching the floor. It’s common for beginners to lose their balance at the bottom. As such, the box can provide safety and stability as you build the strength and control to perform a freestanding, unassisted one-leg squat. One-leg squats are one of the most challenging leg exercises at first, but incorporating them into your leg workouts will really help you build strength and balance. Exercise 5. Hover Lunge You can think of this almost like a lunge where your rear foot and back leg remain hovering in the air. You’ll need to lean forward a bit more than in a standard lunge in order to stay balanced while on your front leg. Reaching both arms forward helps with the balance as well. Be careful to lower yourself down with control – especially during those last few inches – in order to avoid any impact on your rear knee. Check out the video below and give this calisthenics leg workout a shot and let me know how it goes! What is Calisthenics, Anyway? Calisthenics is a type of bodyweight exercise that is intended to increase strength, flexibility, and endurance. The beauty of calisthenic exercises is that it is simple, doesn’t require equipment, and can be done anywhere. Jumping jacks are a classic example. Calisthenics can be used for upper body, core, or leg workouts. You can use the exercises I’ve described above for a great, varied, calisthenics leg workout at home or at the gym. Some people think bodyweight leg workouts aren’t enough to promote muscle growth in your legs. Try these calisthenics leg workouts for yourself and you’ll see! Interested in more lower body and upper body exercises designed to build your strength and burn calories? You can head to my website to find out about calisthenic exercises, pistol squats, plyometric exercises, and more. –Al Kavadlo Al Kavadlo is one of the world’s leading experts in bodyweight strength training and calisthenics. He’s also the author of several books, including the Amazon bestsellers Get Strong and Street Workout. The content of this post does not constitute and is not intended to be a substitute for professional medical advice, diagnosis or treatment. Always seek the advice of a physician or other qualified health provider with any questions or concerns you may have about your health or a medical condition.
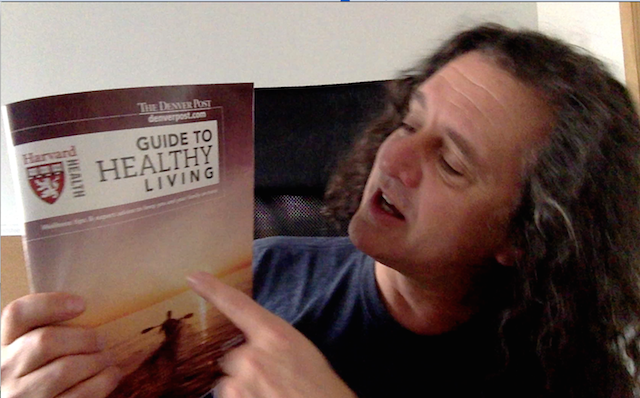
Harvard's Guide to Healthy Feet - Are you doing what they say?
Our local newspaper, the Denver Post included an insert, The Harvard Health Guide to Healthy Living. Lots of great info in there, but my favorite is the section, Keeping Your Feet Healthy. What does it recommend? Check out this video for a few highlights and my commentary. And if you want to read the transcript instead of watching, it's below the video. What do you think? Are you doing what Harvard recommends? Add your comments, below. Download the article here Transcript Hi, Steven Sashen here from xeroshoes.com to talk about something that I got in the newspaper as an insert the other week. It is the Harvard Health Guide to Healthy Living. There's a lot of great information in here but there's one section that I really want to talk about, and let's take a look at that, shall we? It's the "Guide to Keeping Your Feet Healthy." Now, in this guide to keeping your feet healthy, there are a couple of highlights that I really want to point out and here's the first one. Read down here under Foot Fitness, “Exercising your feet on a regular basis not only improves overall foot health but may reduce your risk for injury,” and here's the highlighted part, “Walking is the best overall foot exercise. When you walk, you put your foot through its full range of motion from the time your heel hits the ground until you lift off with your toes.” Okay, first of all, love the idea of putting your foot through its full range of motion, love the idea of walking, have a big issue with that phrase “heel hits the ground.” You don’t want your heel to hit the ground. You want your heel to contact the ground. You want to use your foot. You want your heel to touch the ground but you don’t want it slamming down. So what you end up wanting to do, what you actually want to do, is have your foot land kind of underneath your body rather than way out in front of your body. If you reach way out with your foot, you'll slam your heel into the ground and that'll cause what’s called an impact transient force spike through all of your joints. What you want to do instead is let your foot land underneath you. You may be a little flatfooted, you may land on your midfoot, you might even land on your forefoot – suffice it to say, you don’t want to slam your heel. You don’t want to hit your heel. You want your heel to contact the ground naturally. Now, the next part, “letting your foot go through its full range of motion.” In order for your foot to go through its full range of motion, you need a shoe that lets your foot go through its full range of motion. If you have a stiff shoe with a really high heel, it can't go through its full range of motion. With a high heel, your heel’s already way up and you don’t get that plantar flexion. You don’t get that toe coming towards your knee that is part of the full range of motion in your ankle. And if the shoe itself is stiff, your foot can't move properly. You have one-quarter of the bones and joints of your entire body in your foot and ankle and you want to have a shoe flexible enough to take advantage of that. So for example, our Xero Shoes. This is our Xero Shoes Prio. It is a running fitness shoe. People use this for road-running, trail-running, CrossFit, yoga, gym-going, pretty much anything you can think of. Of course, casual wear as well. And when it comes to not elevating your heel so that you can get that full range of motion and the plantar flexion—you can see the heel is not elevated—when it comes to letting your foot bend, move and flex naturally, well, let's just do this. Yeah, that'll do it. And that amount of flexibility is not unique to our Prio. All Xero Shoes do that. This is our Z-Trail sandal. Think Chaco, Teva, Keen, but this thing weighs one-quarter as much and is much, much thinner and, as you can see, does that same crazy flexible rolling thing that lets your foot move through its full range of motion. Even our casual shoes—this is our Hana men’s casual canvas shoe—same thing, just as flexible as all Xero Shoes because natural foot motion is so important to us. Thank you, Harvard, for telling everyone else that it's important for them as well. Alright, let's go into the next point: “Basic steps to help prevent many foot problems – buy shoes that fit well with low heels and plenty of room for your toes.” Well, I already talked about the low heel part. Not only are Xero Shoes a non-elevated zero-drop heel, but they're also non-elevated. This is a low-to-the-ground sole for balance and agility. You might hear about some shoes that are zero-drop—means they don’t elevate your heel, which messes with your posture—but they're still an inch, two inches off the ground. You don’t want that. You want something low to the ground for balance and agility. And when it comes to plenty of room for your toes, think about most of the shoes that you have that are pointy and squeeze your toes together – Xero Shoes, on the other hand, have a nice wide toe box so your toes can spread and relax and splay and move naturally. And again, true on our sandals, true on our casual shoes. It's one of the core principles we believe in, is natural fit, letting your toes bend, relax, flex, and splay naturally. Let's take a look at the last point: “Make sure your shoes provide enough support but allow your feet to breathe.” Okay, let's talk about support. Many people think they need arch support. "You must have arch support." You go to a doctor and he'll tell you, that if you have any problem, you need arch support. Well, what does support actually do? It actually stops your foot from moving. Go back to that putting your foot through its full range of motion. When you have something supporting your arch, it can't actually move through the full range of motion. More, think about the idea of support in general. You're keeping the foot from moving. You're basically putting it in a cast. Imagine putting your arm in a cast. When it comes out of the cast, it's not stronger, it's not healthy, it's not flexible. It's weak. It's atrophied. In fact, there is a company that had a trade show booth next to us. They made insoles for your shoes and they had a drawing of a bare foot and then a drawing of a bare foot with their insole thing, and it said “37% less stress, instantly!” And I said, “By stress, are you measuring muscle activation with an EMG, an electromyograph?” And they said, “Well, yes,” very proudly. And I said, “So what you're saying is, the moment I step on that insole of yours my muscles are working 40% less, so I'm getting almost 40% weaker just by standing on that insole. Wouldn't it be better if I had 100% less stress by putting my foot in a cast or a foot coffin and never moving it at all?” and they did not have a good answer for that. An arch — think about it — architecturally, it is the strongest structure there is. You can put enormous amounts of pressure on it from the top and it's totally stable. What makes an arch fall apart? Supporting it, pushing it up from the bottom, the whole thing falls apart. You don’t need arch support, 99.9% of people. You don’t need arch support. You need strong arches. Whether you have flat feet or high arches, strength is the important thing, not support. And the way you get strength? Let's go back to where it says walking is one of those best forms of exercises. Move your foot through the full range of motion. Running, too, as long as you can move your foot through its full range of motion. So that's my little rant about support. And let's talk about breathing. Breathing isn't just about having a breathable upper so that you can get air in there, which these have. It's just about letting your foot have the space to move. That's why “breathe” is in quotes. And again, nice wide toe box, nice and wide across the midstep as well, or the instep as well. So Xero Shoes are designed so that you get a great comfortable fit that lets your feet move naturally. So that's the basic thing I wanted to share with you. I want to thank Harvard for putting out the Harvard Guide to Health Living and for having people who are wonderfully smart and talk about actually using your feet naturally instead of binding them up in foot coffins and having them get weaker and weaker over time. If you have any questions, drop us a line or check out Xero Shoes at xeroshoes.com. And as we always love to say, Live Life Feet First" The content of this post does not constitute and is not intended to be a substitute for professional medical advice, diagnosis or treatment. Always seek the advice of a physician or other qualified health provider with any questions or concerns you may have about your health or a medical condition.
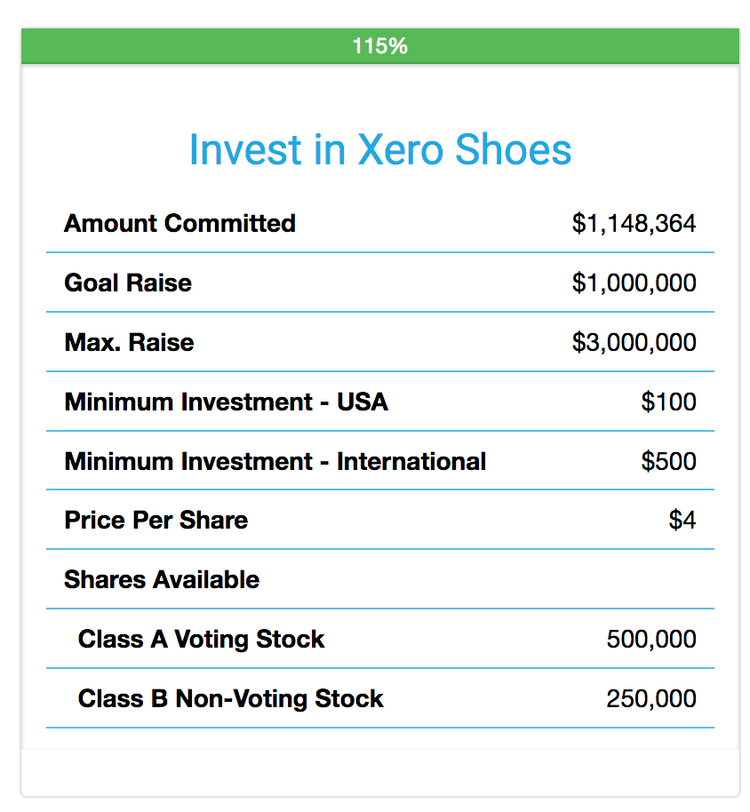
Sign up for the Investor Waiting List
After a successful raise that ended on August 31st, 2017, with over $1,148,348 committed, we've stopped taking new investors.We may do another equity crowdfunding raise in the future.If you would like to be notified about future opportunities to invest in Xero Shoes, please submit your best email address below:

Proper foot placement when running
If someone tells me they're having almost any problem or issue with natural running, the odds are well over 75% that the issue comes from "overstriding."Overstriding is when you land with your foot further out in front of your body than is necessary or ideal. Watch little kids run and they almost never do it. Not even when chased by ravenous chickens!See how the foot lands almost under the hips?Put modern running shoes on them, their gait will change, and they'll start to reach out with their leg, landing on the heel.Do this when you're barefoot and it HURTS.Do this in a barefoot-inspired or true-minimalist shoe, like Xero Shoes (both shoes and sandals), and you'll typically hear of three issues: Sliding off the sandal or into the thong of the huarache-style sandal -- this is because the sandal hits the ground and stops moving as your foot continues to move forward. Tightening the lace or webbing isn't a real solution. Slapping noises -- this comes from, well, slapping your foot onto the ground. When you land on your heel, your foot can't articulate properly and the forefoot comes down with extra force. If you land on your forefoot when you overstride, that can lead to stress fractures, but first it'll just be loud. See this article for some more info. Heel blisters -- landing with your foot in front of your body is like putting on the brakes with each step, and that horizontal deceleration creates friction, and friction leads to blisters. See How to Avoid a Barefoot Running Blister and see the first video at https://xeroshoes.com/barefoot-myths-lies-and-truth-free-video-series/ for more about this. If you land with your foot "under" your body (it may be slightly in front of your center of mass), all those issues go away. In fact, if you land that way, you can wear a sandal that's barely tied to your foot and it won't make any noise, nor will you slide off it and you won't get blisters. It'll be like you're running barefoot, but just before you land, someone throws a piece of rubber on the ground.Here's one of my favorite examples. In this video, the runner accelerates to full speed on a carpet that's over ICE... then runs for a few strides at full speed without any slipping.You'll have to pause the video and play with the slider to see how his feet are landing under his center of mass.What this highlights is that when you're running at a constant speed, especially at full speed, almost all of the force into the ground is vertical. Add more horizontal force, e.g. by overstriding, and your feet would slide right out from under you.Whattya' think? The content of this post does not constitute and is not intended to be a substitute for professional medical advice, diagnosis or treatment. Always seek the advice of a physician or other qualified health provider with any questions or concerns you may have about your health or a medical condition.
Become a Part-Owner of Xero Shoes
Now you can invest in a company you believe in, and it doesn't cost millions to do it! Here's a presentation I did at NextGenCrowfunding on June 16th, describing the opportunity to invest in the Future of Footwear. Find out more and see how you can become a part-owner of Xero Shoes at https://invest.xeroshoes.com This is not an offer to buy or sell securities. Any securities offered are qualified in their entirety by and subject to the terms of the Offering Circular, which can be found at https://xeroshoes.com/sec. Investing in shares of Feel the World, Inc. is highly speculative involves significant risks and is suitable only for persons who can afford to lose their entire investment. Furthermore, investors must understand that such investment could be illiquid for an indefinite period of time. No public market currently exists for the shares of Feel the World, Inc, and if a public market develops following this offering, it may not continue. Also, past performance should not be relied upon as a forecast of future performance. To obtain a copy of the Offering Circular, go to https://invest.xeroshoes.com/#deal_room or https://xeroshoes.com/sec.

The new Fidget Spinner?
All the cool kids are doing it... why don't you try it?Okay, I cheated... I'm using a magnetic levitation display. But we still hope all the cool kids take Xero Shoes for a spin
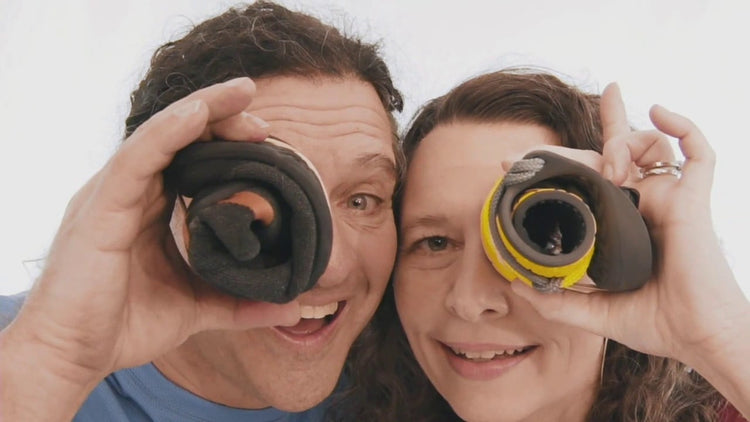
You can own a piece of Xero Shoes
Now you can invest in the future of footwear. We're offering a limited number of shares of stock in our company. And thanks to the new equity crowdfunding rules, you don't need millions to invest. In fact, if you look at the bonuses that come with your investment, you may be quite surprised at the true cost. Check out this video to learn more. And wait for the "Easter egg" at the very end ;-) ... or see how you can become a part-owner of Xero Shoes on this page: https://invest.xeroshoes.com At https://invest.xeroshoes.com you'll also find our SEC-qualified documentation (our financials and all the details about our company), but you can also find them directly at https://xeroshoes.com/sec If you have any questions, there's a Q&A section at https://invest.xeroshoes.com as well. And be on the lookout for emails from us... we'll be hosting Facebook Live events to tell you more. Oh, if you're not already receiving our emails, subscribe at the bottom of this page. We are so thankful to everyone who has helped us make Xero Shoes what it is today. And we look forward to having you come along for the ride into the future. Live Life Feet First! This is not an offer to buy or sell securities. Any securities offered are qualified in their entirety by and subject to the terms of the Offering Circular, which can be found on our investment page at https://invest.xeroshoes.com as well as at at https://xeroshoes.com/sec. Investing in shares of Feel the World, Inc. is highly speculative involves significant risks and is suitable only for persons who can afford to lose their entire investment. Furthermore, investors must understand that such investment could be illiquid for an indefinite period of time. No public market currently exists for the shares of Feel the World, Inc, and if a public market develops following this offering, it may not continue. Also, past performance should not be relied upon as a forecast of future performance. To obtain a copy of the Offering Circular, go to https://invest.xeroshoes.com/#deal_room or https://xeroshoes.com/sec.
No support for support?
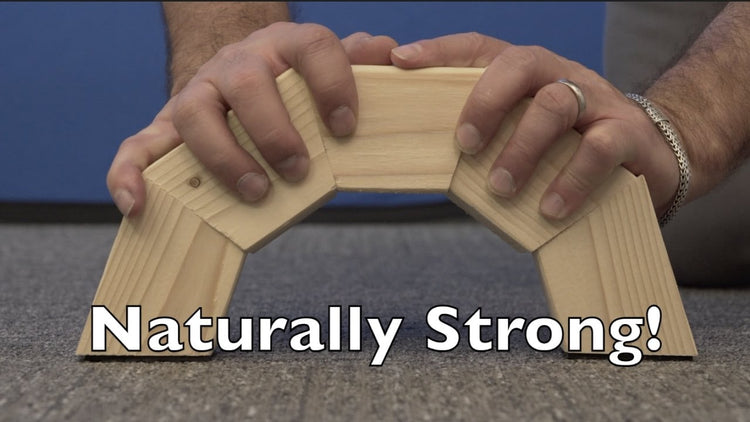
We've said it before and we'll say it again:Support makes you weakThink about it. You break your leg. You put your leg in a cast for 8 weeks. What does it look like when it comes out? Stronger? Nope. Weak and atrophied. Same thing with feet. If you "support" them and don't let them bend and move and flex and feel, you may as well have them in a cast.Xero Shoes are made to let your feet be feet... to move, to bend, to flex, to feel. So you can...Live Life Feet First! Click here to find your new favorite footwearThe content of this post does not constitute and is not intended to be a substitute for professional medical advice, diagnosis or treatment. Always seek the advice of a physician or other qualified health provider with any questions or concerns you may have about your health or a medical condition.
The Lena minimalist casual shoe for women is here!
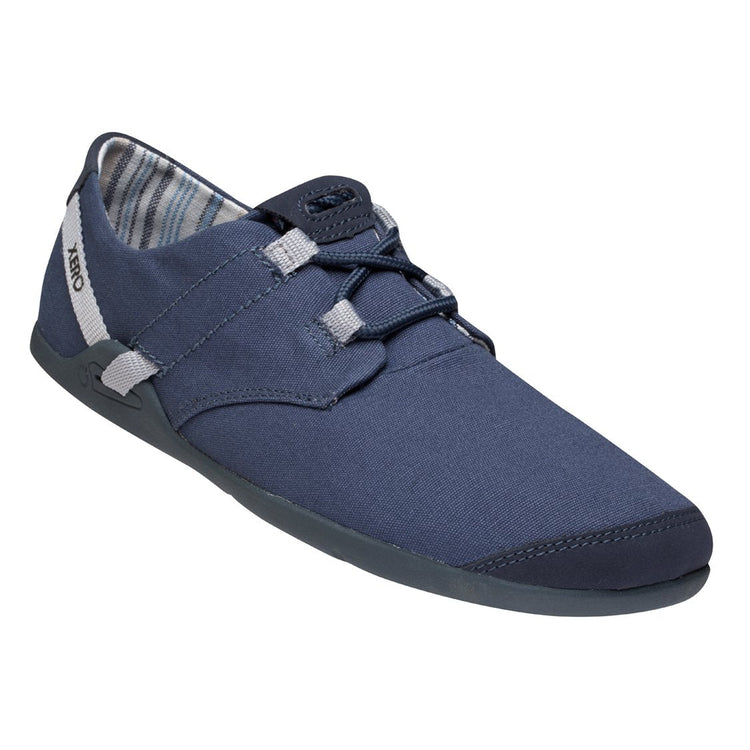
We announced our first closed-toe shoe in October 2016, the Hana. The Hana is mostly a "men's" shoe, even though there are LOTS of women who wear it.Well, we're thrilled to announce the "sister" to the Hana... the Lena.And, yes, technically the Lena is a "women's shoe," but if you're a man with a narrow foot, or are smaller than a Men's size 6.5, the Lena could be just right for you. (What makes a shoe "men's" or "women's" is a combination of typical shape differences -- women's shoes are a bit narrower, have a thinner heel, have a slightly higher instep, for example).The Lena comes in 3 colors for the Spring of 2017: Navy / Silver Sand / Black Black / Tango Red What will you do in the Lena?Well, it is a casual shoe. But it's also built on our FeelTrue® outsole base, the same one we use for the Z-Trail. So, technically, it'll handle more than just a trip to the coffee shop. And, like all our shoes and sandals, the Lena is super flexible, zero-drop, low-to-the-ground for balance and agility, and supports true natural movement. And the sole is backed by our 5,000 mile sole warranty.Oh, and if you're wondering, Yes, we did name the Lena after Xero Shoes' co-founder, owner, and COO, Lena Phoenix.Live Life Feet First!