latest News
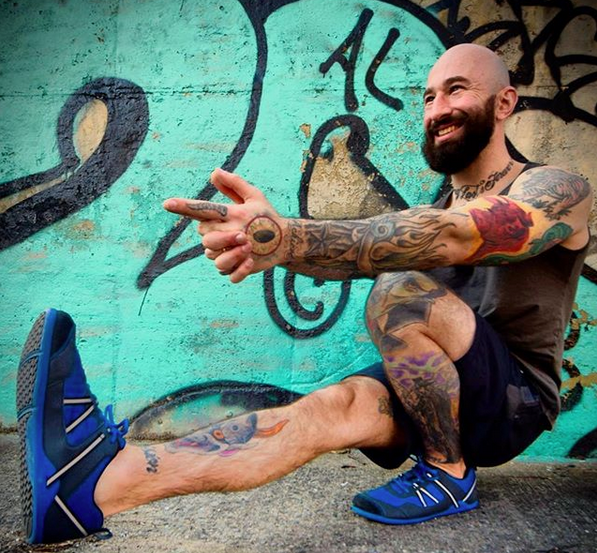
Single Leg Exercises for Foot and Leg Strength
Any time you balance on one leg, you activate muscles in the foot that may otherwise remain underutilized. In fact, standing on one leg can be quite challenging if you’re not accustomed to it, especially when you’re barefoot.Don’t believe me? Give it a shot for yourself right now and see how long you can stand barefoot on one leg.How did it go? Harder than you thought, right?Even if you’re able to balance for a long time on one foot, chances are that you felt yourself having to make lots of tiny adjustments in order to stay balanced—and that’s why standing on one foot is so good for you!Those little adjustments mean your foot has to work a lot harder than when you’re using two legs to support yourself. And that means your feet are going to get stronger!After you’ve gotten comfortable balancing on one foot, you can add in some other elements to increase the difficulty—and the benefits—of standing on one leg.Here are a few of my favorites:1. One Legged Foot HoldStand upright and lift one foot off the floor, bringing your knee as high as you can toward your chest. Slowly reach over and grab beneath your other foot, interlacing your fingers with your hands below your toes. For an added challenge, you can try extending the airborne leg. Either way, don’t forget to keep your standing leg locked!2. Dancer’s PoseThis time you will be holding your non-balancing leg behind your body, rather than in front. Stand upright and lift one leg behind you, grabbing the ankle with the hand of the same side (right hand to right foot, etc.). From here, reach your other arm into the air, lean forward and kick your back leg as high into the air as possible. Try to create balance by simultaneously kicking your foot back into your hand while reaching your other arm forward with equal force.3. Pistol SquatNow you are going to attempt to add a full squat into the equation, which requires considerably more strength and balance than just standing. Begin by standing upright with one leg lifted into the air in front of you. On your standing leg, bend from the hip, knee and ankle to squat all the way down until your hamstrings rest against your calf. Pause here briefly, the press your entire foot into the floor, brace your abs and reach your arms forward to return to a standing position. If you are unable to perform this move, you can practice by holding onto a door frame, pole or other sturdy object for assistance.Remember, the stronger your feet and legs, the better you’ll feel running in your Xero Shoes. Now let’s get out there and feel the world!—Al KavadloAl Kavadlo is one of the world’s leading experts in bodyweight strength training and calisthenics. He’s also the author of several books, including the Amazon bestsellers Get Strong and Street Workout.The content of this post does not constitute and is not intended to be a substitute for professional medical advice, diagnosis or treatment. Always seek the advice of a physician or other qualified health provider with any questions or concerns you may have about your health or a medical condition.
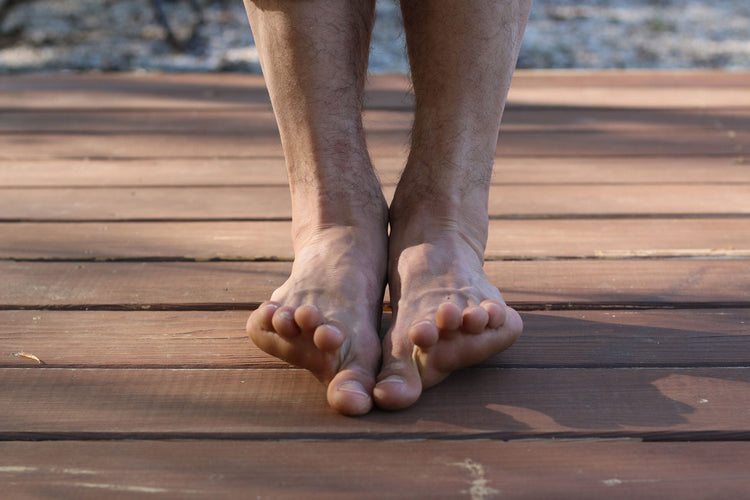
4 Exercises to Strengthen Your Feet
4 Exercises to Strengthen Your Feet (And Ankles) This article was recently updated on April 10, 2023 I’ve always been a fan of shoes as a fashion statement. However, when looking cool or sexy becomes the priority over feeling good, we have a problem. It is no secret nowadays that the health of our body directly affects how we think and feel. The last 10 years of my life have been dedicated to helping others feel good in their body and mind. When it comes to feeling good, I always start with the feet. Why Are Foot Strengthening Exercises Important? Many of us know how to stretch and strengthen our abs, chest, shoulders, thighs, and buttocks. But what about the feet and ankles? Feet are the foundation of our posture, but they are often ignored at the gym. You can improve your overall well-being by practicing a few main joint movements of the ankles and toes. Further down I will go over a few daily exercises to improve your health from the ground up. Your Feet Affect Everything When I teach yoga - especially my hip-focused workshops, I spend 20% of the time on the feet and ankles. The health of your feet directly affects all of the muscles and joints above, including the hips, knees, and lower back. "Supportive" Shoes Are Only A Quick Fix I always find it comical that modern medicine provides these solutions for your foot problems: Shove a sole into your shoe to lift your arches for you Find shoes that articulate your ankles for you while you walk Don't get me wrong, there is a time and place for these quick solutions. However, they are not a long-term solution that will make your feet stronger. Here is an analogy of what short-term solutions do to your body. Pretend that your body is a lazy employee at work, and your doctor is the manager. The manager can either: Teach us how to be productive and inspire us to take action Simply do the work for us and teach us nothing Firing the employee is not an option - you only have one body, after all! The best option, of course, is the one that is better for us in the long term. However, most of us don't actually take the time to support our overall well-being. If you're reading this, you probably aren't a "lazy" human being. You are looking for solutions and answers, and you are willing to do the work. This is why you have chosen to wear barefoot shoes from Xero Shoes, isn't it? You want to take care of your long-term foot health! So, let's get into building strength. How Can I Make My Foot Muscles Stronger? In order to get stronger feet, let's take a look at the four main actions of the ankle. Dorsiflexion Dorsiflexion is what we commonly refer to as flexing the feet. Stand on two feet and bend your knees, lean forward till your knees move forward. You’ll see the skin at the front of your ankle wrinkles, this action is called dorsiflexion of the ankle joint. Plantarflexion Plantarflexion is the exact opposite of dorsiflexion, and it is commonly known as pointing your foot as a ballet dancer would. Inversion Sit down with your legs out in front and turn the soles of your feet toward each other like you are making “prayer” feet. This is called inversion or inverting your ankle. Note, you may sit up on blankets or a couple of pillows if your hamstrings are on the tighter side. Eversion This is the opposite of inversion and is usually the most challenging. Stand up again, press the big toes down, and pull the outside edges of your feet up. You will see wrinkles form in the outer ankle, and you will feel the muscles along your outer shin engage. What Feet Strengthening Exercises Work? The following foot strength exercises will help to strengthen your muscles so you can perform the actions above: 1. Seated Plantar flexion Sit down with your legs in front. Plantar flex and relax your ankles repeatedly with straight knees. You are trying to activate your calf muscles. Keep your feet everted by squeezing the inner ankles together. If you need to, you can use a yoga strap to help with the range of motion. Try without the strap as well to build up your foot strength. 2. Seated Dorsiflexion This action is the opposite of the first exercise. Sit down with your legs in front and pull the tops of your feet back. Release and repeat three times or more until you feel the heat building in the top of the shins. These muscles are your tibialis anterior muscles. 3. Calf Raises Stand upright with your feet flat on the floor. Plantar Flex your ankles until your heels lift. Try not to let your ankles roll outward during these. The target muscles here are called the gastrocnemius and soleus muscles. To keep the ankles from rolling forward, you'll be using the muscles of the outer shins. 4. Inversion and Eversion Practice the inversion and eversion techniques described above. These exercises are the ABCs for your feet and ankles. Do them daily before getting out of bed to wake up all the muscles in your foot and ankle. Bonus: The Toes Take your foot exercises up a notch by spreading your toes. Also known as abduction, and you can do this either with a toe spreader or using your fingers to separate the toes. With time and repetition, you will be able to use your muscles to spread your toes. Until next time, Matt Giordano, aka @TheYogiMatt The information in this post does not take the place of medical advice. Only your doctor can provide advice, diagnosis, and treatment. Talk to your doctor or physical therapist if you have questions about your health.
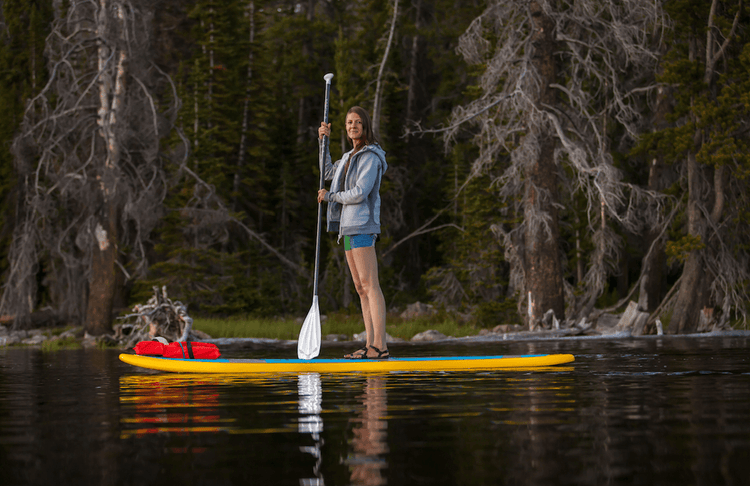
Water? Rocks? Running? Bring it on.
We last left you hanging wondering which model of Xero Shoe we pack along for our different adventures. We often take multiple shoes when we travel, but the Xero Z-Trek sandal always makes the cut due to its versatility, low maintenance and extreme light weight.The Z-Trek is a fantastic sandal for river and water sports. The design keeps the shoe snugly where it belongs (instead of washing out to sea) and it dries within minutes, making water-to-land transitions a non-event. We’re avid stand-up paddle boarders and have hiked our boards (SUPs) to remote waters in many parts of the world, paddling places like New Zealand, Costa Rica, South Korea, Italy, the Mississippi River, Hawaii and the U.S. Pacific Coast. Wherever we paddle, there is one commonality: You must first get to the water. Whether it’s crossing a hot parking lot covered in broken glass, a quarter mile of blistering-hot sand, or carrying our paddle boards down a large field of lava rock, our Z-Trek sandals are the perfect companion to get us to the water. Preparing to paddle the glacier lakes of Mt. Cook, New ZealandLast June, we took our SUPs on a five-day, supported run on the Green River, through Desolation and Gray Canyons. It was an 88-mile run down one of the most remote areas in the lower 48 states. We were surrounded by spectacular scenery devoid of any technology. (Especially so, because the river ate my camera phone on day one.) There were hours of stillness and quiet on the river as it meandered through the deep canyons of the Colorado Plateau, with the occasional adrenaline produced by the roar of sixty Class I-III rapids.Our tent, clothing, food and water were transported by experienced guides on small, solo, inflatable rafts. Many of the rapids had only a few safe lines to take. Some rapids only had one line– and that line changes substantially depending on the volume of water rushing down the canyon. Several times during the five-day expedition we paused upriver of the rapid and hiked out to overlook our upcoming challenge. We scrambled through hot sand and over red sandstone and rock, always watching for small cactus plants and rattle snakes. Then we’d put on our special whitewater life jackets, quick release leashes and helmets for the duration of the rapid.Our mornings were spent striking camp and then navigating downriver for a few hours. We’d break for lunch by finding a calm section of river and circling our SUPs and rafts to distribute food and swap stories. By early afternoon each day we made our campsite for the evening. Campsites are non-developed, governed by a “leave-no-trace” rules and ethos. Since they are taken on a first-come basis, we’d rise early each morning to ensure our party beat the other expeditions downriver to the next camp. Paddling the 10,000-ft lakes of the Uinta MountainsOnce camp was made, we explored the surrounding dry canyons and high desert topography. Or pass time on the river’s edge in our tents, hiding from blood-thirsty mosquitos. Occasionally we’d see another party float by on their journey to their evening camp.Paddling the Green River for five days was an amazing experience and something everyone should consider doing.This weekend we’re traveling to Moab, UT to compete in a paddle board race on a seven-mile section of the Colorado River. It’s our first race of the season. Typical of most SUP races, we have a running start into the river (while carrying our paddles and boards), paddle for about an hour and a then jump off our boards and run a short distance across a rocky shore and parking lot to the finish line. For the past few weeks we’ve debated which paddle boards to take with us; as each race board has its advantages in different conditions. But our footwear will be the Xero Z-Trek sandal – for obvious reasons: This race seems to have been designed around the functionality that we love about the Z-Trek. Water? Rocks? Running? Bring it.See pics and race results this Sunday by following us @WildAcroDuo.Until next time, Chris & Roxy
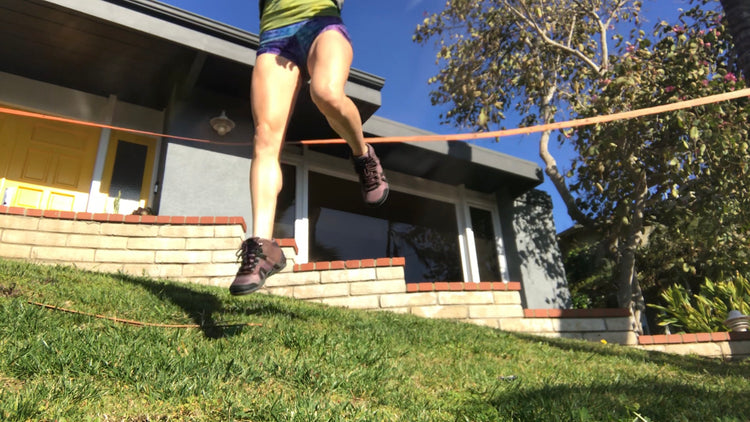
F Sending: Celebrating the Fun of Slacklining with Liz Thomas
For those outside of the slacklining community, let’s start with a quick vocabulary lesson: Send: a verb known to have originated in climbing but has now spread to numerous outdoor sports such as skiing, surfing, highlining, slacklining, mountain biking, and more. In climbing to “send” means that you have climbed the climb in one go (not necessarily the first try), one continuous climb without falling or hanging on the rope. Translated into highlining terms “to send” has come to mean you have walked the whole highline from one end (the point you stand up close to an anchor) to the other end. Slacklining: the act of walking or balancing along a suspended length of flat webbing that is tensioned between two anchors Highlining: slacklining, but up higher (think slacklining above a river) I personally have been very prone to getting obsessed with “the send”. And I’ve got to say sending is great! It feels good. It is like taking a huge dopamine pill once your activity of choice is over and you have “sent it”, even if it was brutally painful to get there. But I think there is a dark side to being obsessed with sending.And that’s why I'm currently on a huge “f sending” (pardon the hidden expletive) movement while slacklining–I cannot get enough of it! I’ve been posting bits and pieces of my thoughts on the subject on Instagram and have been getting positive feedback and want to expand.The dark side, at least for me, is the pressure I put on myself to on-site. There is that classic climbing term that says it all, “on-site or die”. It’s one mentality, but not the one I chose to have anymore. I’ve found that instead of looking at the prize I was obsessed with avoiding failure to a point that is was almost inevitable. This is a little counterproductive. When I teach slacklining I tell people to not look down because they will go down. The same principle applies to your thoughts. Don’t think about falling or else you will fall.Yes I get super excited when I send that highline clean but f sending isn’t about not sending, it’s about celebrating all of the things in between. Celebrate the stands, the whippers, the gnarly line catch bruises all up and down your arms and legs! Celebrate the present! It’s all about creating a positive playful atmosphere for yourself and others by changing your outlook of success.In every sport you do remember we all started it because whatever it is we thought it was fun! Somewhere along the way we start getting better and then we get serious. It’s fun to send lines, routes, and new skills but F SENDING and remember to have fun along the way! “The best surfer is the one having the most fun.” Duke Kahanamoku “The best climber in the world is the one having the most fun.” Alex Lowe To sum things up, the road to success inevitably has failures all along the way, so I just like to remember to giggle at every single one.—Liz Thomas, highline athleteFollow Liz on Instagram to see her adventures in Xero Shoes
5 Calisthenics Leg Exercises to Build Strength and Muscle
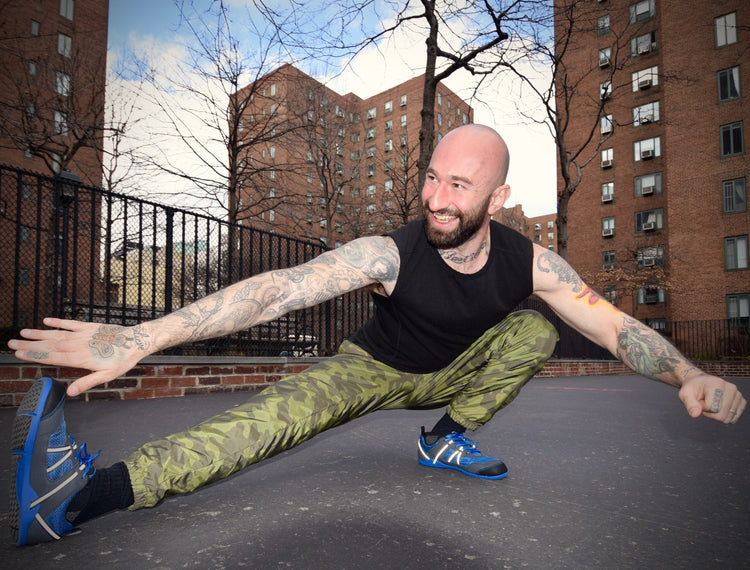
This post was recently updated September 26, 2023 For most sports, leg strength can give you, well, a leg up on the competition. Even if you’re not an athlete, though, leg strength is important for health and wellness. If you like to exercise but you aren’t a gym person, you might think that running, cycling or hiking are your only options for a decent leg workout. But there is so much more you can do to strengthen your lower body without lifting weights or using machines. Here are 5 of my favorite calisthenic leg exercises for developing strong legs and glute muscles. (Wondering what calisthenic leg workouts are all about? See my note at the end of this post.) Ready to develop strong legs? Let’s go! Bodyweight Squat Walking Lunge Archer Squat One Leg Box Squat Hover Lunge Exercise 1. Bodyweight Squat This is the most fundamental strength building exercise for the legs. This classic leg squat hits all the muscles of your lower body and may be a mobility challenge for some folks as well. To perform a bodyweight squat, start with your feet hip distance apart, then reach your arms forward, bend your knees and sit back into your heels. When your hips get below knee height, return to a standing position and repeat. Working your way up to 40-50 consecutive bodyweight squats will set you up with a fantastic foundation to progress your lower body strength training. Exercise 2. Walking Lunge The walking lunge requires a bit more body awareness than the standard squat. It also introduces a balance component and is a great way to hit your leg muscles from different angles. Walking lunges are the perfect complement to bodyweight squats. Stand with your feet together, then take a big step forward with one foot and lower your back knee toward the ground, keeping your leg in a straight line, stopping just before it touches. Keeping your front foot where it is, step forward with your other leg and stand back up, alternating legs with each rep. It is a similar motion and has some of the same benefits of a split squat with a bit more challenge. Exercise 3. Archer Squat This asymmetrical squat variation is a beautiful merger of strength, flexibility, balance and control. It’s also a great way to target your inner thighs and can be an early lead-up step toward one-legged squats. Begin with a wide stance, then keep one leg straight as you squat all the way down on the opposite leg. Return to the start position and repeat on the other side. Exercise 4. One Leg Box Squat Stand facing away from a box, bench or other object that’s around knee height, then lift one leg into the air. Carefully sit back onto the box with your knees bent, then stand back up without your extended foot touching the floor. It’s common for beginners to lose their balance at the bottom. As such, the box can provide safety and stability as you build the strength and control to perform a freestanding, unassisted one-leg squat. One-leg squats are one of the most challenging leg exercises at first, but incorporating them into your leg workouts will really help you build strength and balance. Exercise 5. Hover Lunge You can think of this almost like a lunge where your rear foot and back leg remain hovering in the air. You’ll need to lean forward a bit more than in a standard lunge in order to stay balanced while on your front leg. Reaching both arms forward helps with the balance as well. Be careful to lower yourself down with control – especially during those last few inches – in order to avoid any impact on your rear knee. Check out the video below and give this calisthenics leg workout a shot and let me know how it goes! What is Calisthenics, Anyway? Calisthenics is a type of bodyweight exercise that is intended to increase strength, flexibility, and endurance. The beauty of calisthenic exercises is that it is simple, doesn’t require equipment, and can be done anywhere. Jumping jacks are a classic example. Calisthenics can be used for upper body, core, or leg workouts. You can use the exercises I’ve described above for a great, varied, calisthenics leg workout at home or at the gym. Some people think bodyweight leg workouts aren’t enough to promote muscle growth in your legs. Try these calisthenics leg workouts for yourself and you’ll see! Interested in more lower body and upper body exercises designed to build your strength and burn calories? You can head to my website to find out about calisthenic exercises, pistol squats, plyometric exercises, and more. –Al Kavadlo Al Kavadlo is one of the world’s leading experts in bodyweight strength training and calisthenics. He’s also the author of several books, including the Amazon bestsellers Get Strong and Street Workout. The content of this post does not constitute and is not intended to be a substitute for professional medical advice, diagnosis or treatment. Always seek the advice of a physician or other qualified health provider with any questions or concerns you may have about your health or a medical condition.

The Barefoot Running world has lost a true friend
There are a number of semi-celebrities in the barefoot running world (that is, famous in the niche, but not necessarily well known to the general public).But there's one man whose influence and value to those of us who support and benefit from natural movement eclipses all the celebs combined.His name is Bill Katovsky and this post is an all-too-brief and undeniably insufficient memoriam, as Bill unexpectedly died last week.Only those truly "in-the-know" and attentive to the goings on in the barefoot and minimalist movement (and the seeming backlash from maximalist footwear), have a glimmer into how much Bill contributed, since Bill was in the background more often than the foreground. And if I list his credits, I'll surely underestimate Bill's level of responsibility. From co-authoring books, like Tread Lightly, to writing innumerable articles, to co-creating and managing the idea of Natural Running Center-affiliated stores, to maintaining the online presence for NRC... many of you reading this now are here, in part, thanks to Bill's efforts.Personally, my relationship with Bill was one that could only have existed in the Internet-age. He found me online, and then called for a "brief chat" that lasted 6 hours.We never met in person, though I regularly offered to fly him to Colorado so we could plan our barefoot takeover of the world.We spoke almost weekly, usually for hours at at time. On average, Bill and I exchanged at least one email per day. And I say "on average" because I might not hear from Bill for a few days, but when he was on a creative rant, I'd get 10 or 20 within minutes of each other.Putting into practice the myriad marketing ideas that Bill tossed in my direction would take more than a lifetime for more than one company.Bill had an encyclopedic memory of all-things running and triathlon (he coined the term triathlete, and founded the magazine of that name). And we shared a deep passion for finding the underlying truth about human performance, and all forms of comedy (hence our 2 hour "chats").Bill was always a huge supporter of me and of Xero Shoes, both as a product and a business. He was the ultimate sounding board. Generous with his mind and ideas. And his death is truly a loss for the barefoot and natural movement community.We can only hope to honor his memory by bringing to fruition all that he wanted for us and the world.You can find more about Bill from some who were closer to him than I:From Nick Pang - http://naturalrunningcenter.com/2015/11/09/bill-katovsky-1957-2015/From Roy Wallack - http://www.slowtwitch.com/Opinion/Bill_Katovsky_R.I.P._5456.htmlFrom Scott Tinley - http://www.trihistory.com/t-3/death-voice#/0
Xero Shoes Sponsors the Warrior Hike
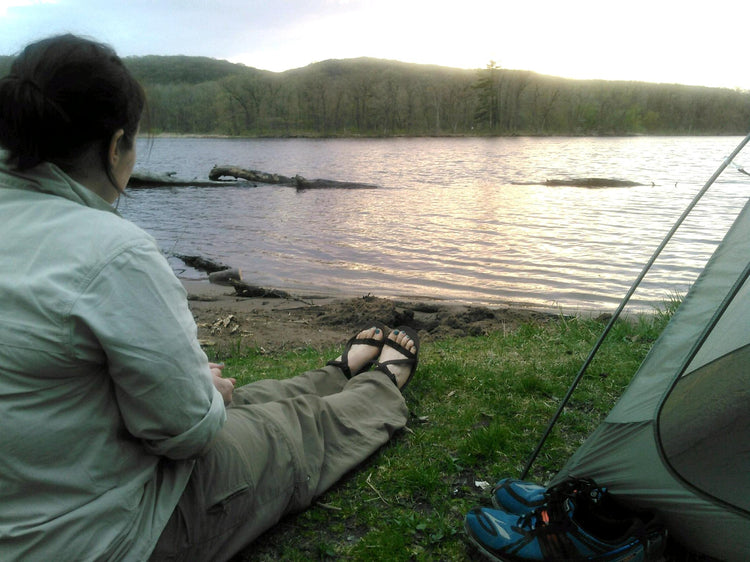
For the second year, Xero Shoes is a proud sponsor of Warrior Hike.What, you may ask, is Warrior Hike?Well, I can't explain it better than what it says on their website: In 1948, Earl Shaffer told a friend he was going to “walk off the war” to work out the sights, sounds, and losses of World War II. Four months later, Earl Shaffer became the first person to hike the entire length of the Appalachian Trail from Georgia to Maine. Following in Earl Shaffer’s footsteps and in recognizing the therapeutic effects of long distance hiking, Warrior Hike has created the “Walk Off The War” Program which is designed to support combat veterans transitioning from their military service by thru-hiking America’s National Scenic Trails. Here are some pics that just came in from the Ice Age Trail and the Continental Divide Trail. More coming soon. Some of the Hikers wear their Xeros as camp shoes, giving their feet some breathing room at the end of a day in boots.Others are through-hiking IN their Xero Shoes.Click Here to get your Xero Shoes
I dare you to run barefoot! Or bigfoot. Or both!
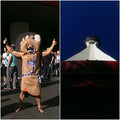
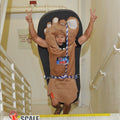
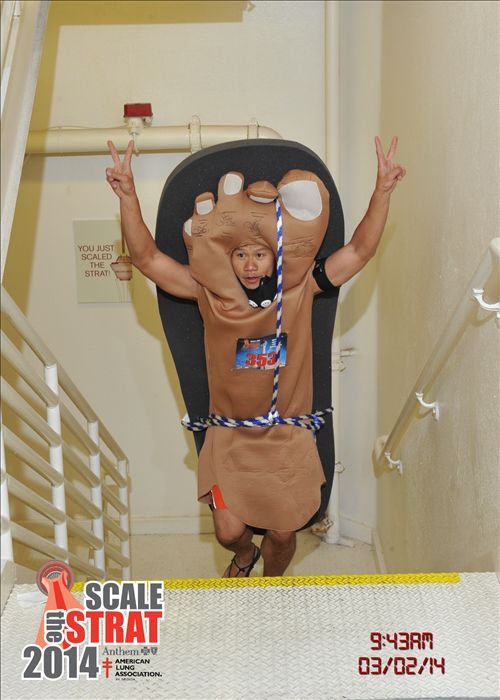
What inspires someone to take off their shoes and run barefoot?For Khanh Nguyen it was knee pain and the hope that barefoot running would help.Once he got started, in bare feet and in Xero Shoes, he was on fire. He's run 1/2 marathons, mud races and, most recently, he ran UP the Stratosphere Hotel in Las Vegas in his Xero Shoes. AND, he did it in our Bigfoot, the Xero Hero costume!Enjoy this really fun interview with Khanh, and see what motivates him to run (hint: his brother dared him!)
Bigfoot wears barefoot shoes? Yup.
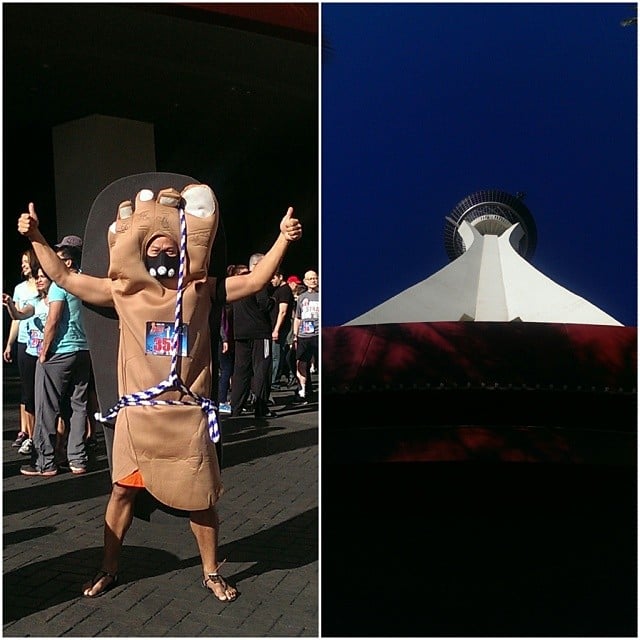
Have you seen bigfoot?If you were in Las Vegas on March 2nd at the Stratosphere hotel, you probably did.In fact, you may have seen this mysterious barefoot beast climb the Strat!While most people who claim to see bigfoot have grainy, fuzzy pictures or video, we have high-resolution proof of his existence. And, even more, we have proof that Bigfoot wears barefoot running shoes. Xero Shoes, to be exact!Here's a pic of the legendary monster at the base of the Stratosphere (that's looking UP the building). You can see his barefoot footwear (and his elevation training mask, which scares off the easily upset).Then, just a short time later, Bigfoot was spotted at the top of the hotel! Apparently happy that he's avoided capture yet again.In reality, this is our friend and Xero Shoes athlete, Khanh Nguyen, dressed as Bigfoot, the Xero Hero. Khanh scaled the Strat as part of a fundraiser to support the American Lung Association. You can add your support by clicking here.

