Genesis DIY Sandal Kit: Customize Your Own Barefoot Sandals
You asked. So we brought it back.
The Genesis DIY Sandal Kit returns to where it all began — a simple, handmade solution that grew into something bigger. When we paused the DIY kit during our Shopify migration in October 2025, we didn’t expect much reaction.
We were wrong.
You kept asking for it — again and again. What started as our original product is still one of the most meaningful. That’s why it’s back, and why we’re calling it what it is: the Genesis DIY Sandal Kit.
The Origin Story
Before Xero Shoes was a brand, it was a solution.
Back in 2009, founders Steven Sashen and Lena Phoenix weren’t trying to build a company — they were solving a personal problem. Steven was a Master’s All American Sprinter, but his training was regularly sidelined by injury. That’s when he tried running barefoot and he felt a difference.
You can’t be barefoot all the time, so that’s when he tried making his own sandals. Then others in his run club wanted one, too.
What started with friends in Boulder quickly spread. People weren’t just wearing the sandals — they were making them. Choosing their own cords. Experimenting with tying methods. Creating something uniquely theirs.
Everything was done by hand. Steven and Lena turned the living room into the workspace. They sourced cord and rubber from hardware stores and shipped kits from the local post office.
That’s when it became clear: this wasn’t just a sandal. It was a different way to think about footwear.
Over time, the design showed up in unexpected places — including Australia Fashion Week in 2023, and across fashion and culture in 2024 and 2025 as minimal, functional sandals re-emerged.
But this isn’t about trend cycles.
The Genesis DIY Sandal Kit is the origin of everything we do. Pictured below is Steven and Lena with more than 500 orders (2013).

Re-Introducing the Genesis DIY Sandal Kit

This is the starting point.
The Genesis DIY Sandal Kit strips things back to what matters: a thin, flexible sole and a durable cord system. No unnecessary structure. No overbuilt features. Just what you need to move naturally.
It’s simple by design — and that simplicity is intentional.
But what makes this different isn’t just how it feels. It’s how you experience it.
You don’t just open a box and put something on.
You open a box and start creating.
You choose the look. You control the fit. You shape the final result with your own hands.
That’s what this kit offers:
-
A hands-on, customizable design
-
A sense of ownership and craftsmanship
-
A simple, approachable process from start to finish
Because this isn’t just something you wear. It’s something you make
How to Make Your Genesis DIY Sandals
Ready to create your own customized sandal? Everything you need to build your sandals is included—plus a few simple tools you likely already have at home.
Your Genesis DIY Sandal Kit comes with the following:
-
Cord
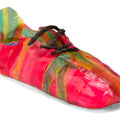
Choose from 18 different colors. The 100% polyester cord is soft, durable, water-resistant, and designed to hold its color over time. Want to switch up your look later? You can grab additional cord options here. -
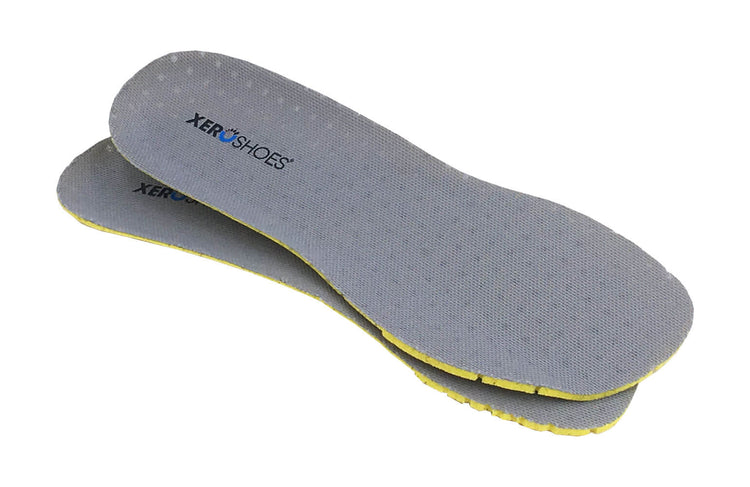
FeelTrue Outsole
Pick between Black or Mocha Earth, with two thickness options: 4mm or 6mm. Both give you a close-to-the-ground feel while still protecting your feet.
(For reference, our Genesis sandal is 5.5mm.) -
Hole Punch
Used to create the toe hole for your custom fit.
You’ll also need a few basic tools (not included):
-
Hammer
-
Lighter
-
Magazine or thick paper (to protect your surface while punching the hole)
-
Optional: pliers, bobby pin, or lacing tool for easier threading
The video below provides a visual, or you can also follow the step-by-step written instructions.
Prep Your Sandals
Step 1: Find Your Size
Before buying your sandals, determine your foot length (you’ll select from options A–K).
-
Place a blank piece of paper on the ground against a wall
-
Stand with your heel touching the wall
-
Mark your longest toe
-
Measure heel to toe with a ruler
Choose the closest size.
Step 2: Mark Your Toe Hole Placement
Now it’s time to customize your fit.
Place your foot on the sole and mark a spot about ¼ inch in front of the webbing between your big toe and second toe.
-
Prefer a slightly different feel? You can shift the hole slightly toward your second toe.
Step 3: Punch the Toe Hole
-
Place the sole on a magazine or thick surface.
-
Hold the punch straight (perpendicular) to the rubber.
-
Use a hammer to punch your hole. Depending on the 4mm or 6mm outsole, you may need to do a few whacks to punch through the rubber.
Note: The 6mm sole may require a few extra hits.
Step 4: Create a Stopper Knot
Before lacing, you’ll need a stopper so the cord doesn’t pull through the toe hole.
You have two options:
Option A: The Figure-Eight Knot
-
Form the knot: Take the end of your lace, go over the top, wrap it around, and pull it back through the loop you created.
-
Flatten it: As you pull tight, shape the knot with your fingers to keep it as flat as possible so it won’t bunch up under your foot.
-
Seal the knot: Briefly apply a lighter's flame to seal the knot without burning it. While warm, press it flat with your fingers or a pair of pliers.
Option B: The Melted Lace Bead (For polyester or nylon laces only)
-
Fray the end: Shred or fray the end of your lace. If your lace has a metallic reflective tracer, cut it off first, as it burns at dangerous temperatures.
-
Melt the bead: Carefully use a lighter to melt the frayed ends into a bead. Try to avoid letting it catch fire, though it may happen.
-
Shape and cool: Immediately press the melted end firmly onto a metal tool, like pliers, to flatten it. Let it cool and harden completely for about a minute.
Step 5: Make Threading Easier
Getting the cord through the holes can be tricky. Try one of these:
-
Melt a firm tip: Heat the end of the lace with a lighter (do not burn it) and press it with your fingers to form a firm, plastic-like tip that pushes easily through the rubber hole.
-
Remove the core: If the lace is still too thick, pull the inner core out by about half an inch and cut it off. Stretch the outer lace back over the empty space, heat it, and pinch it into a smaller, firmer point to push through.
-
Use a hairpin tool: Feed the lace through the looped end of the included hairpin lacing tool. Push the two prongs of the hairpin through the sole's hole, and use pliers to grip and pull the pin (and the lace) completely through.
Now you’re ready to actually lace your sandals!
Lacing Your Genesis DIY Sandals
In this video, you can see how a little bit of handiwork and creativity turns into your own unique sandals from our Genesis DIY Sandal Kit. Don’t worry, it’s easier than it looks!
Step 1: Thread the cord through the toe hole
Insert the cord through the toe hole from bottom to top. The knot should be on the bottom of the sole.
Step 2: Thread the cord through the outside ankle hole
Bring the cord to the outside ankle hole and thread it from top to bottom. Bring the cord toward the front of the sandal, then loop it underneath and back around to create a loop around the outside ankle hole.
Step 3: Run the cord across the heel
Take the cord across the back of the sandal where your heel strap will sit.
Step 4: Thread the cord through the inside ankle hole
Thread the cord through the inside ankle hole from top to bottom.
This time, loop the cord from the back to the front to create a loop around the inside ankle hole.
Step 5: Tie the main knot
Starting with the cord coming from the inside ankle hole:
-
Loop it over and then under the top cord coming from the toe hole.
-
Then loop it over the inside ankle loop and over the outside ankle loop.
-
Thread the cord through the triangle-shaped opening created by the cords.
-
Pull tight.
This secures the main structure of the sandal.
Step 6: Create a second cord pass.
To create the double-cord design:
-
From the center knot, bring the cord down toward the inside ankle loop.
-
Loop it under the top cord.
-
Then bring it over the cord that forms the heel backing.
This creates a locking wrap that helps hold the strap in place.
Step 7: Lace around the heel
Bring the cord around the back of the heel:
-
Loop it under the outside ankle loop
-
Then under the lower heel cord
-
Then over the top cord coming from the toe post
At this point, you should see two even lines of cord running from the center huarache knot, around the ankles, and across the heel.
Step 8: Finish the final knot
Slip the sandal on your foot before tying the final knot and trimming excess cord. To secure everything:
-
Slightly loosen the center knot
-
Thread the cord through once more
-
Pull tight to lock it into place
-
Trim off remaining cord
Step 9: Adjusting the fit
The final step is all about personal preference. Adjust until the sandal feels secure and comfortable on your foot.
Everyone will have their own preference for the final fit for the knot placement, cord tension and footbed.
-
Knot Placement: Adjust top knot to what feels right – closer to your toes or further back to your shin.
-
Cord Tension: You’ll want the cord to feel snug but comfy, likely fitting a finger or two under the cord. If your sandals feel too loose, the footbed can move around under your foot or the cord can rub your foot.
-
Footbed: You can trim the footbed with a pair of scissors to better fit the shape of your foot. Ensure there are a few millimeters of rubber in front of your longest toe and behind your heel.
Once the fit feels right, you do not need to untie the knot each time. You can simply slip the heel strap on and off.
You’ve done it!
We can’t wait to see what you design! Tag us @xeroshoes to show off your style.