latest News

Genesis DIY Sandal Kit: Customize Your Own Barefoot Sandals
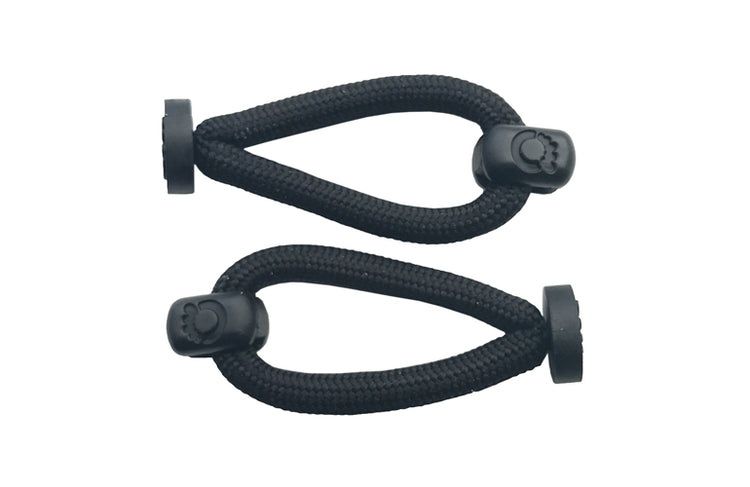
You asked. So we brought it back. The Genesis DIY Sandal Kit returns to where it all began — a simple, handmade solution that grew into something bigger. When we paused the DIY kit during our Shopify migration in October 2025, we didn’t expect much reaction. We were wrong. You kept asking for it — again and again. What started as our original product is still one of the most meaningful. That’s why it’s back, and why we’re calling it what it is: the Genesis DIY Sandal Kit. The Origin Story Before Xero Shoes was a brand, it was a solution. Back in 2009, founders Steven Sashen and Lena Phoenix weren’t trying to build a company — they were solving a personal problem. Steven wanted a sandal he could sprint in without getting injured. So he made one. Then others wanted one, too. What started with friends in Boulder quickly spread. People weren’t just wearing the sandals — they were making them. Choosing their own cords. Experimenting with tying methods. Creating something uniquely theirs. Everything was done by hand. Living room workspace. Hardware store materials. Shipping kits out from the local post office. In 2013, that simple idea reached a national stage on Shark Tank. The founders turned down the deal — but within a week of airing, more than 270,000 people visited the site. That’s when it became clear: this wasn’t just a sandal. It was a different way to think about footwear. Over time, the design showed up in unexpected places — including Australia Fashion Week in 2023, and across fashion and culture in 2024 and 2025 as minimal, functional sandals re-emerged. But this isn’t about trend cycles. The Genesis DIY Sandal Kit is the origin of everything we do. Re-Introducing the Genesis DIY Sandal Kit This is the starting point. The Genesis DIY Sandal Kit strips things back to what matters: a thin, flexible sole and a durable cord system. No unnecessary structure. No overbuilt features. Just what you need to move naturally. It’s simple by design — and that simplicity is intentional. But what makes this different isn’t just how it feels. It’s how you experience it. You don’t just open a box and put something on. You open a box and start creating. You choose the look. You control the fit. You shape the final result with your own hands. That’s what this kit offers: A hands-on, customizable design A sense of ownership and craftsmanship A simple, approachable process from start to finish Because this isn’t just something you wear. It’s something you make How to Tie your Genesis DIY Sandals Ready to create your own customized sandal? Your Genesis DIY Sandal Kit comes with everything you need—just choose your cord color and outsole color when you place your order, and you’re ready to go. Cord Colors: 18 different colors! Outsole Colors: Black or Mocha Earth Outsole Rubber: 4mm or 6mm Both outsoles provide a close connection to the ground, so you feel like you’re barefoot, but your feet are protected. (For reference, our Genesis sandal is 5.5mm) In this video, you can see how a little bit of handiwork and creativity turns into your own unique sandals from our Genesis DIY Sandal Kit. Follow along with the video below, or you can also follow the step-by-step written instructions (download here). After choosing your outsole and cord, follow these steps to lace and tie your sandals. 1. Punch the holes Use the hole punch provided to punch a toe hole positioning it between the big toe and second toe 2. Make a stopper knot Before threading the cord through the outsole, create a stopper at one end of the cord so it will not pull through the sole. Tie a knot at the end of the cord. Carefully use a lighter to melt the knot slightly so it stays secure. 3. Thread the cord through the toe hole Insert the cord through the toe hole from bottom to top. The knot should be on the bottom of the sole. 4. Thread the cord through the outside ankle hole Bring the cord to the outside ankle hole and thread it from top to bottom. Bring the cord toward the front of the sandal, then loop it underneath and back around to create a loop around the outside ankle hole. 5. Run the cord across the heel Take the cord across the back of the sandal where your heel strap will sit. 6. Thread the cord through the inside ankle hole Thread the cord through the inside ankle hole from top to bottom. This time, loop the cord from the back to the front to create a loop around the inside ankle hole. 7. Tie the main huarache knot Starting with the cord coming from the inside ankle hole: Loop it over and then under the top cord coming from the toe hole. Then loop it over the inside ankle loop and over the outside ankle loop. Thread the cord through the triangle-shaped opening created by the cords. Pull tight. This secures the main structure of the sandal. 8. Create a second cord pass. To create the double-cord design: From the center knot, bring the cord down toward the inside ankle loop. Loop it under the top cord. Then bring it over the cord that forms the heel backing. This creates a locking wrap that helps hold the strap in place. 9. Lace around the heel Bring the cord around the back of the heel: Loop it under the outside ankle loop Then under the lower heel cord Then over the top cord coming from the toe post At this point, you should see two even lines of cord running from the center huarache knot, around the ankles, and across the heel. 10. Finish the final knot To secure everything: Slightly loosen the center knot Thread the cord through once more Pull tight to lock it into place Trim off remaining cord Now you can wear the sandal and adjust the cord tension until the sandal feels secure and comfortable on your foot. Once the fit feels right, you should not need to retie the knot each time. You can simply slip the heel strap on and off when wearing your sandals. You’ve done it! Download the DIY instructions here. We can’t wait to see what you design! Tag us @xeroshoes to show off your style. The Genesis DIY Sandal Kit isn’t just back—it’s where everything started. Simple. Customizable. Built by you.
What are Zero-Drop Shoes?
You may have heard of the term, “zero-drop” as it relates to our shoes. But what exactly does it mean? Zero-drop simply means your heel and forefoot are at the same height. If you’re standing barefoot on flat ground, this is your body’s natural position—balanced, aligned, and stable. Now compare that to most modern shoes. "Zero Drop" is not just a footwear industry term anymore. It’s an essential part of Xero Shoes’ barefoot DNA. In this blog, we’ll break down what zero-drop shoes are, how they compare to traditional footwear, and why they’re a key part of natural movement. What Is “Heel Drop” in Shoes? Most traditional shoes are built with an elevated heel, meaning your heel sits higher than the ball of your foot. This design was originally intended to cushion impact in runners. But here’s the catch: That elevated heel can subtly shifts your body forward and changes how your body moves. That’s why a non-negotiable with barefoot shoes is a zero-drop design. Having your entire foot from heel-to-toe in one plane allows for natural movement. A barefoot shoe’s thin, flexible sole allows your feet and toes to bend and flex. Zero-Drop vs. Traditional Shoes Here’s the simplest way to think about it: Traditional Shoes: Elevated heel (positive drop) Thick cushioning Stiff structureToe spring (toes pushed upward) Barefoot Shoes (like Xero Shoes): Zero-drop (level from heel to toe) Thin sole for ground feedback Flexible so your foot can move naturally Foot-shaped design for natural toe splay The Big Misconception About Zero-Drop You may have seen many footwear brands promoting “zero-drop” shoes. Sounds like a step in the right direction, right? Sometimes. But not always. Here’s where things get misleading. Not all zero-drop shoes are barefoot shoes. Not all zero-drop shoes promote natural movement. Some shoes are labeled “zero-drop,” but still: Have added cushioning that limits groundfeel Feature stiff soles that limit natural movement Include toe spring (where your toes are pushed upward unnaturally) So while the heel height might be level, the overall experience is still far from barefoot. Zero-drop alone doesn’t equal natural movement. What Actually Makes a Shoe “Barefoot” If a shoe truly supports natural movement, it’s not just about drop. It’s about the full package: Zero-drop (level heel and forefoot) Thin sole for ground feedback Foot-shaped design so your toes can spread naturally Flexibility so your foot can move naturally No forced arch support Miss one of these, and you’re not really getting the benefits people associate with barefoot shoes. We design Xero Shoes to be minimal to the max: Everything you need to optimize your body’s natural movement. Nothing you don’t. Why This Matters for You It’s easy to get caught up in labels like “zero-drop” or “minimalist.” But the real question is: Does the shoe let your foot move the way it’s designed to?That’s what actually matters. When your footwear works with your body instead of against it: Movement feels more natural Your feet can function the way they’re supposed to And comfort comes from alignment—not artificial support Or put simply: The goal isn’t just a flatter shoe. It’s a freer foot.

Tips to Clean Your White Shoes
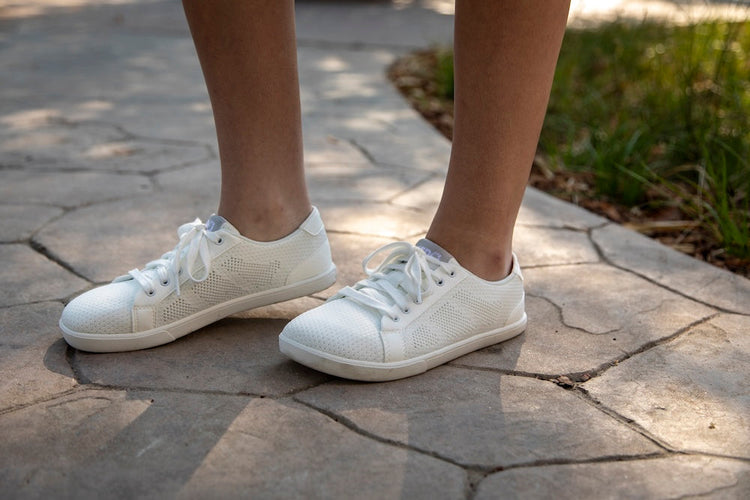
White shoes look bright and clean until… you do practically anything. A speck of dirt, a coffee drip, a scuff. Everyday life leaves real marks. The good news? Keeping your white Xero Shoes fresh doesn’t require harsh chemicals or a complicated routine — just the right approach for the right material. Read on for tips to keep your white Xero Shoes clean, with special care instructions for knit, mesh, leather, suede and canvas. Let’s start simple. The 3-Step Xero Shoes Cleaning Method For most materials like knit and mesh, we recommend an easy, 3-step method, and you likely already have everything at home. Step 1: Mix a Gentle Solution Combine: 2 cups cold water 1 teaspoon non-bleach laundry detergent Why non-bleach? Bleach can weaken fibers, discolor uppers, and break down materials over time. Step 2: Spot Clean Gently Grab an old toothbrush or soft plastic-bristle brush. Avoid metal, which can tear materials. Lightly scrub dirty areas on the top, side and bottom of your shoes (ie: upper, sidewalls, and soles.) Step 3: Air Dry. Always. Rinse cleaned areas with cold water. Let your shoes air dry completely. We don’t recommend putting shoes in the dryer, using heaters, or any heat method to speed up drying. High heat can warp materials and shorten the life of your shoes. How to Clean Specific Shoe Materials With more than 70 styles of Xero Shoes out there for performance, casual and everything in-between, our shoes are designed with the best materials for the intended use. If you want to get specific with your shoe cleaning, scroll to the material for specific care instructions. Knit Lightweight. Breathable. Flexible. Knit uppers are built to move — but they don’t love being soaked with water. How to clean: Brush off dry dirt first. Use the mild non-bleach laundry detergent and water mix (50/50). Gently scrub with a plastic bristle brush in circular motions. Avoid oversaturating with cleaner or water.Stuff with paper towels while drying to maintain shape. Skip: Machine washing Hot water Knit structures can stretch or lose integrity under high heat or heavy agitation. Keep it gentle. Mesh Mesh is breathable — which means dirt can hide in tiny openings. And with many Xero Shoes performance and hiking footwear made with this material, if you wear them right, you’ll have to clean them often. How to clean: Tap shoes together to knock off loose debris. Dry-brush first with plastic bristle brush. Clean lightly with diluted non-bleach detergent and water solution. Blot stubborn spots with a wet microfiber cloth. Skip: Aggressive scrubbing Chlorine or bleach-based cleaners Too much friction can fray fibers. Controlled pressure works better. Leather Leather is tough — but to keep your leather boots or shoes looking good for years to come, focus on a balance of minimal water and leather conditioning. How to clean: Wipe dirt off with a damp cloth. Use mild soap and water sparingly. Wipe clean with a dry microfiber cloth (don’t soak). Stuff inside with paper towels (or paper bags). Let air dry. Apply leather conditioner with a microfiber cloth once dry. Conditioning helps restore natural oils and keeps leather supple and strong. Skip: Submerging in water Household cleaners Abrasive brushes Suede Suede is leather’s more sensitive cousin. How to clean: Let mud dry completely first. Use a suede brush to lift dirt. Use a suede eraser for small stains. For tougher spots, lightly dab with white vinegar. Brush again after drying to restore texture. Skip: Soaking in water Scrubbing hard Liquid detergent saturation Water can flatten suede’s texture and leave marks. Canvas Durable. Classic. Surprisingly easy to clean. How to clean: Use a plastic bristle dry brush to loosen debris. Use a mild non-bleach detergent/water mix. Scrub gently. Rinse lightly. Air dry. For bright white canvas, a baking soda + water paste can help lift stains. Skip: Bleach (it can yellow over time) Dryer heat Should You Use a Protectant Spray? If your shoes are brand new, applying a protectant spray (like Scotchgard™ or KIWI® Protect-All) can help repel water and stains. Always test a small area first. Think of it as preventative care — not a force field. How Often Should You Clean Your Shoes? The sooner you clean them, the easier because dirt that stays on materials bonds to fibers over time. A quick wipe-down after messy adventures saves you from deep scrubbing later. If you wear your white shoes often: Light wipe weekly Deeper clean as needed Want Care Instructions for a Specific Style? Check the Care tab on each Xero Shoes’ product page. We include material-specific guidance there so you don’t have to guess.
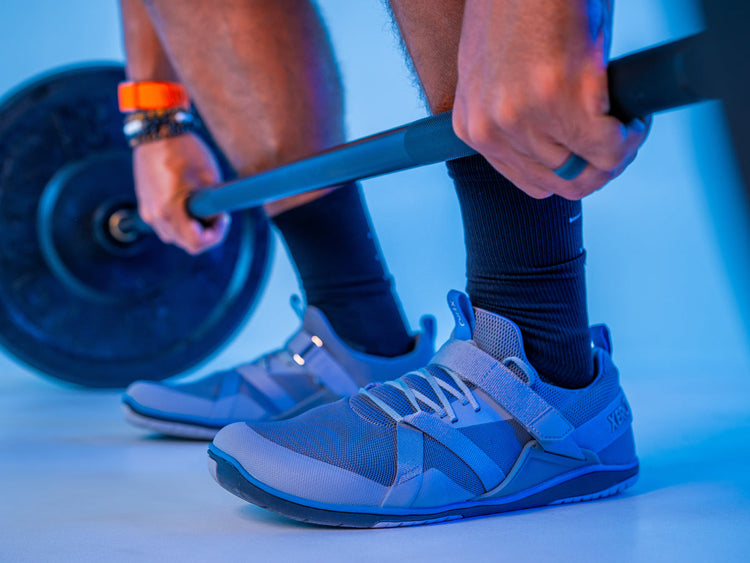
Barefoot Shoes for Weightlifting & Strength Training
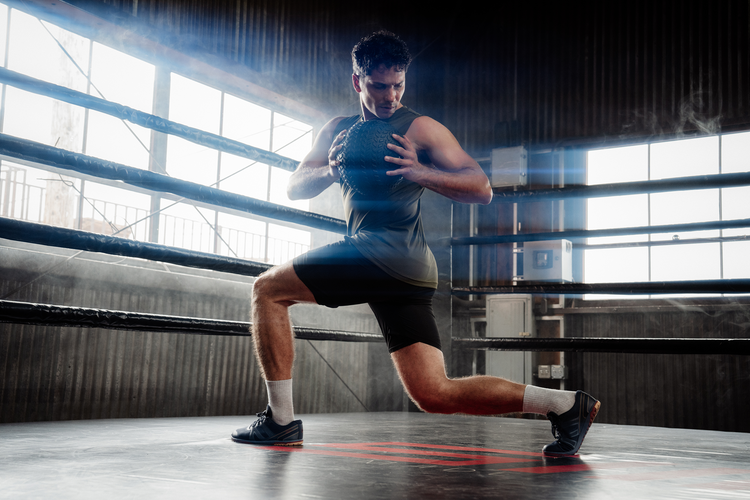
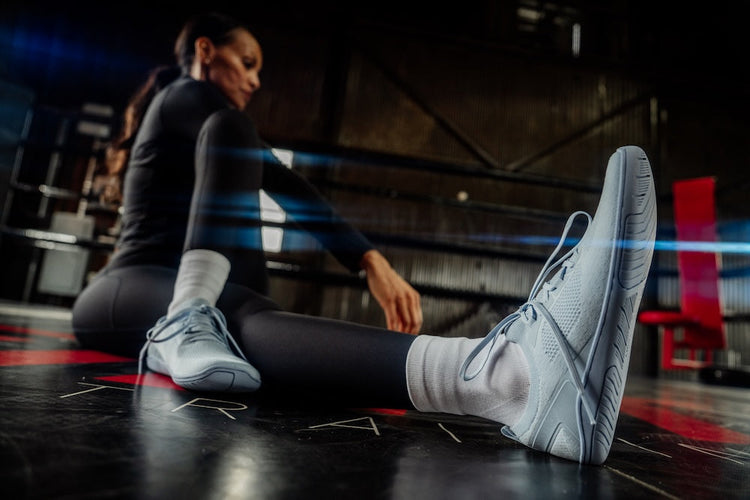
Think about the last time you went to the gym. You probably planned your outfit. But when was the last time you thought about your shoes? Unless you're a competitive lifter, chances are you just grabbed whatever sneakers you had — the same pair you run in, walk the dog, even run errands. And if that’s the case? You might be leaving strength gains on the floor. Why Do Some Weightlifters Workout Barefoot? When you deadlift, swing a kettlebell, or press a barbell overhead, what’s the first thing you feel your body do? Your feet push down into the ground. That downward force is your foundation. And if your foundation is unstable, your lift is compromised. To create real stability, your feet need three things: A wide base (toes able to spread naturally) Ground feedback (so your brain knows what your feet are doing) Active muscular control (which begins with that sensory feedback) Think about walking on stilts. Or walking with two pillows strapped to your feet. It’s awkward, right? The higher and softer the platform, the less stable you feel. That’s what happens with thick, cushioned shoes. Foam compresses and traditional shoes that have added cushion in the heels (added heel drop) shift your weight forward. Narrow toe boxes squeeze your base. And the padding absorbs force you’re trying to send into the ground. If strength begins with the feet — and many lifters swear it does — then unstable footwear could hamper your potential. The Benefits of Working Out Barefoot Training barefoot gives you: Better balance and stability. Direct ground contact creates a solid base compared to shoes, where cushioning and heel padding can mess with your weight distribution. Improved proprioception. That’s your body’s ability to sense position and movement. When your feet feel the floor, your brain can fine-tune balance and coordination. Better form. When lifting barefoot, your feet and toes can better grip the ground and maintain balance, which translates into better technique. Natural force transfer. Instead of force being absorbed by thick cushioning, it goes directly into the ground — and back up through your body. But most gyms won’t let you lift barefoot. Going fully barefoot isn’t always practical (or sanitary). That’s where barefoot training shoes come in. Barefoot Shoes for Weightlifting If you want the benefits of barefoot training with protection, a barefoot, zero-drop shoe is your best bet. Zero drop means your heel and forefoot sit level with each other. No artificial forward tilt. No raised heel throwing off your posture. Here’s why that matters: You stay closer to the ground. Your weight stays balanced. Your mechanics stay natural. Xero Shoes are designed with: A thin, flexible sole for real ground feel A wide toe box so your toes can spread for stability Lightweight construction so your shoes don’t become ankle weights Research even shows that simply walking in minimalist footwear strengthens foot muscles as effectively as dedicated foot exercise programs. Imagine what lifting in them can do. Strong feet = stronger foundation. Stronger foundation = stronger lifts. Tips For Transitioning To Barefoot Exercise If you’ve been wearing thick, cushioned shoes for years, your feet have likely been underworked. Don’t rush the transition. Start Slow If you’ve never worn minimalist shoes before, you’ll want to introduce them the way you would any new exercise or gear—slowly. Build Foot Strength You need to wake up your foot muscles, so start with easy foot balances and strength exercises. A 2019 study by Dr. Sarah Ridge found that walking in minimalist shoes strengthens the muscles in your feet as much as following a foot strengthening exercise program. Increase Gradually As your feet and muscles get stronger, slowly increase the duration and intensity of your workouts. Add just one new exercise or movement at a time to avoid overexertion. Listen to Your Body Some muscle soreness is normal. Rest when needed. Don't push yourself too hard too quickly or ignore any discomfort. The content of this post does not constitute and is not intended to be a substitute for professional medical advice, diagnosis or treatment. Always seek the advice of a physician or other qualified health provider with any questions or concerns you may have about your health or a medical condition.
Easy Ways to Improve Your Fitness in 2026
We asked fitness experts for achievable tips to elevate your fitness game this year. We're not talking about extreme makeovers; we're talking about small, sustainable changes that can make a big difference. Keep reading for expert tips on walking, running, workouts, and more. Your Fitness Experts Muscle by Maria Karl of LIV Better Fitness Kristina of Fit & Bendy Born To Run Coach, Eric Orton Muscle by Maria "Walking is a simple, yet effective way of improving your overall health. Studies have found that aiming for a daily step count of 7,000 to 10,000 steps can contribute significantly to: Cardiovascular fitness Weight management Mental well-being Cognitive function Prevention of chronic diseases. Additionally, regular walking increases daily NEAT (Non-Exercise Activity Thermogenesis), which plays a significant role in your overall calorie burning and metabolic health." Follow Muscle by Maria for more fitness tips. www.musclebymaria.com Instagram: @musclebymaria Karl of LIV Better Fitness "Are you feeling the effects of aging, such as aches and pains you didn’t have before? As a busy parent, age seems to catch up to you in a hurry. You need to address these things now, rather than later. Everyone focuses on strength training and cardio, but few prioritize mobility and flexibility. All that you need to do is dedicate 10-15 minutes each day to basic stretching and mobility exercises, focusing on quality movement and range of motion. Target your weaknesses, rather than avoid them. Incorporate these into your warmups and cool-downs to save time. Trust me, your ankles, knees, hips, and shoulders will thank you." Follow Karl of LIV Better Fitness for more fitness tips. www.livfitkarl.com Instagram: @LiveFitKarl Kristina of Fit & Bendy "A little bit of exercise is vastly better than no exercise at all. Not every workout has to be a 10 mile uphill sprint! If you are feeling tired, busy, or injured, just do what is available to you even for just a few minutes here and there. Doing clamshells while watching a movie is still exercise, and it’s still worth doing." Follow Kristina Cañizares of Fit & Bendy for more fitness tips. www.fitandbendy.com Youtube: @FitandBendy Born To Run Coach, Eric Orton "How To Start Running Successfully: The biggest mistake beginning runners make is running too hard and doing it for an outcome like weight loss or fitness. So try these steps for success:When first starting, only run at a FUN, enjoyable effort. Include walk breaks to keep the effort easy. Run for as long as it is fun, and then stop and walk. Run less, but more often. Keep it fun, and the fitness will follow." Follow the Born to Run Coach, Eric Orton, for more fitness tips. www.ericorton.com Youtube: @BornToRunCoach Instagram: @borntoruncoach

Why We Made the 360 Rally
Meet the Xero 360 Rally — a lightweight, minimal training shoe built for athletes who move fast, cut hard, and demand control from the ground up. The 360 Rally is designed around the principles of natural movement, delivering unmatched ground feel, stability, and agility so your body can move the way it’s meant to. From strength sessions in the gym to fast-paced rallies on the pickleball court, this shoe keeps you connected, balanced, and ready to react. With a low-to-the-ground feel and flexible design, the 360 Rally supports quick pivots, precise footwork, and explosive movement without sacrificing comfort. It’s grounded enough for strength training, yet agile enough for dynamic, multi-directional play. Natural movement, built for performance — and built for longevity. Train with intent. Compete with confidence.
Xero Shoes Coupon Scams
If you search for "Xero Shoes Coupons" you'll find a huge number of sites claiming to offer savings. The problem? Most of them are scams designed to get you to click their links, not to actually save you money. We get calls all the time from frustrated customers who tried a code they found online, only for it to fail at checkout. We understand that's annoying, and we're just as frustrated — these sites hurt our customers and our reputation. We monitor the best we can, but we may miss some. So if you’re one of the people upset about getting a non-working "Xero Shoes Coupon," we understand that you're annoyed. Here's the truth: any discount codes we offer come directly from us — through our emails (sign up here) or our own promotions. If you got a code from a third-party site and it isn't working, that code almost certainly isn't from us. If you have a code you received directly from Xero Shoes and it's not working, please reach out to our support team and we'll take care of you.
Which Scrambler Is Right for You?
Whether you’re headed out for an easy day on the trail, setting off on a multi-day trip or aiming for a new speed record, there’s a Xero Shoes Scrambler that will be the perfect fit for your adventure. This guide will help you choose which Scrambler is right for you.Like all our shoes, the Scrambler family is rooted in barefoot principles… Wider, foot-shaped toe box designed to let your toes splay for greater comfort and balance. Zero-drop heel promotes natural posture and movement for improved stability and agility. Thin, flexible sole gives you ground feedback to help you move better over any type of terrain. They’re also more lightweight than you would expect any hiking shoe to be. You know how, at the end of a long day of hiking, the first thing you want to do is take off your shoes? You won’t feel like that in any version of the Scrambler. Even after putting in the miles, your feet will still feel good.But each Scrambler has unique features that will determine the best choice for you… *eVent Membrane: Designed to withstand any weather condition, eVent® BIO Footwear is a waterproof and planet-positive laminate that combines cutting edge technology with highly renewable plant-based materials. Derived from tall oil, a byproduct of wood pulp, BIO Footwear offers good abrasion resistance, ensuring your shoes stand the test of time.*Michelin Fiberlite: The thin Michelin fiberlite technology in the sole gives unparalleled strength, flexibility, and lightness. Plus, with mud-shedding lugs inspired by Michelin’s high-performance mountain bike tires, you feel the confidence that comes from incredible grip.The Scrambler Trail SeriesThe Scrambler Trail Series features a mix of mid- and low-cut, waterproof and non-waterproof hiking shoes made for day hikes and backpacking trips. The grippy lugged outsoles are up to tackling moderate terrain and the barefoot design means these are comfortable for long days on the trail.Scrambler Trail Mid – All-Day Comfort for Warm, Dry HikesThis hiking boot is highly breathable with an abrasion resistant upper that’s ready for tough terrain. The gusseted tongue keeps debris out. The durable mesh upper with welded overlays provides lightweight, flexible protection. The larger lugs give you ample traction for confidence and agility on the trail.The Scrambler Trail Mid keeps feet cool and comfortable throughout the day, even when you’re putting in a lot of miles.You’ll also enjoy good ankle protection that doesn’t feel too stiff. And the lacing system ensures a snug but not restrictive fit… important to feeling confident when you’re hiking on uneven ground.Bottom Line: This is our most comfortable hiking boot for warm, dry hiking conditions. If you’re putting in a lot of miles, hiking over uneven terrain, and enjoying a sunny day… that’s the perfect setting for the Scrambler Trail Mid.Scrambler Trail Mid WP – All-Day Comfort No Matter the Terrain or WeatherOur Scrambler Trail Mid WP is the waterproof version of the Scrambler Trail Mid.You’ll enjoy the same lightweight comfort, durability, and rugged traction, but with the added protection of being waterproof. The XeroTex™ membrane and gusseted tongue keep water and debris out. The mid-cut design offers the ankle protection you want for longer or more technical hikes. Even when you’re hiking a steep trail on a rainy day, you’ll feel secure on your feet… and your feet will feel dry and comfortable. Bottom Line: When you want to put in the miles no matter the terrain or the weather, the Scrambler Trail Mid WP is a great choice. This boot is waterproof and grippy — perfect for cool, wet conditions — but still comfortable on warmer days.Scrambler Trail Low WP - A Low-Profile, Waterproof Trail RunnerIf your favorite weekend activity is a long day hike exploring somewhere new, then the Scrambler Trail Low WP could be the perfect Scrambler for you. Featuring the same abrasion-resistant mesh upper with welded overlays as the Scrambler Trail Mid, this trail runner gives you the lightweight, flexible protection you want on rough terrain.You’ll feel light and agile on your feet in any weather, and your feet will stay dry in soggy weather conditions and through stream crossings. Bottomline: A low-profile, waterproof trail runner that can handle serious hiking conditions.The Scrambler Michelin SeriesThe Scrambler Michelin Series features hiking boots and trail running shoes with our Michelin fiberlite sole. Made in collaboration with Michelin (the car and bike tire company), these soles boast unparalleled strength and flexibility while being unexpectedly light.Whether you’re out for a run on your favorite trail or tackling technical terrain, the combination of exceptional grip and lightweight design make the Michelin series a great choice.Scrambler Mid II – Ultra-Light Hiking Boot with a Michelin Fiberlite SoleThe Scrambler Mid II is up to the technical needs of an epic hike, but so comfortable, you won’t mind leaving them on when you finish your day.This boot’s Michelin fiberlite sole is combined with mud-shedding lugs so you have incredible grip on the trail.The Scrambler Mid II’s abrasion-resistant, vegan-friendly, breathable upper and welded sidewalls keep dirt and debris out of your boots. The moisture-wicking lining allows airflow even on the hottest days, so your feet stay dry and comfortable.Bottom Line: Whether you take it for a day trip or a speed hike, the Scrambler Mid II offers all the capability of a robust hiking boot while feeling more like a shoe.Scrambler Mid II WP – Ultralight Waterproof Hiking BootIn the Scrambler Mid II WP, you get a bio-based internal membrane that’s 100% waterproof but that allows moisture to escape. That means even when you’re working hard, your feet will remain dry and comfortable.We’ve paired the best in waterproof protection with the superior grip of our Michelin fiberlite sole and a tightly woven, abrasion-resistant, breathable mesh upper that keeps debris out and that’s durable in the face of rough terrain Bottom Line: Whatever you need, the Scrambler Mid II WP delivers… comfort on long hikes… grippy on technical terrain… waterproof for when the weather gets soggy… and lightweight so you feel agile on the trail.Scrambler Low – Lightweight Trail Runner with Exceptional TractionRace, hike, scramble, and explore in the Scrambler Low.In addition to outstanding grip from the Michelin fiberlite sole, in the Scrambler Low you’ll also enjoy exceptional breathability, so your feet stay comfortable and dry, even when you’re working hard.When you’re running over distances, enjoying a leisurely walk, or putting in the miles on the trail, the Scrambler Low gives you all-day comfort on the road, trail, or gravel paths. Bottomline: Comfortable from the moment you put them on — great performance for a variety of activities and terrains.Scrambler Low EV – High-Performance Trail RunnerIf what you need is an all-terrain shoe with a barefoot feel and just the right amount of protection to feel the trail and enjoy every step, the Scrambler Low EV is the right call.The outsole, with Michelin Fiberlite technology, provides lightweight grip with unparalleled flexibility for confidence and agility on the trail. This shoe fits like a glove — so comfortable, you might forget you have it on.And they’re made to be tough, breathable, and quick drying, so whatever you do in them, you can count on doing it in comfort. Bottomline: This is our lightest trail runner yet. You’ll find it tough, breathable, and comfortable on or off the trail.Every Xero Shoes Scrambler gives you a true-to-barefoot experience. You’ll enjoy more room for your toes, zero drop for natural posture, and thin, flexible soles for good ground feel. That all adds up to all-day comfort no matter how you love to spend your time outdoors. For trail-running, day-hiking, and back-packing, you can’t beat the comfort, durability, and flexibility of the Scrambler series.
Xero Shoes Coupon Codes
Looking for a Xero Shoes Coupon Code? Here's what you need to know. There are several websites out there claiming to have coupon codes for Xero Shoes — and almost all of them are fake. So when you see someone advertising that they have coupons for Xero Shoes they are flat out lying. Why would they do that? Because they’ve figured out a way to make money when you click their links. If you have a code you found on a third-party coupon site, it likely won't work. We do occasionally run our own promotions and send discount codes directly to our community — but those come from us, not from random websites. The best way to get real deals is to subscribe to our emails, so you hear about any specials directly from the source.
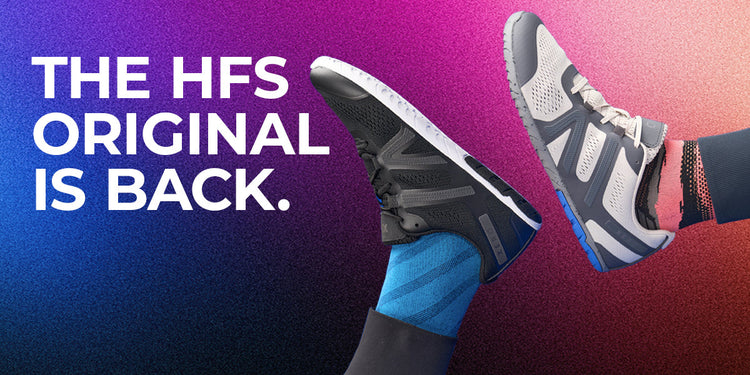
HFS Original or HFS II... Which One Is Right for Me?
Five years ago we launched the HFS road-running shoe, which became a huge favorite with barefoot enthusiasts for running and many other activities, as well.Then a little over a year ago, we launched the updated HFS II.Since many people owned both versions, we did a survey and asked which they liked better, the HFS Original or the HFS II… And the clear winner was… both.Survey results were 50/50 almost down to the number. You spoke. We listened.That’s right, the HFS Original is back! But that brings up a question…What’s the Difference Between the HFS Original and the HFS II? HFS Original vs HFS II - Which Is For You?Which HFS is right for you will depend on what you want from your running shoe…HFS Original – For a More Barefoot FeelIf you want as little as possible between you and the road when you run, then the HFS Original is the shoe for you. The HFS Original gives you: A closer connection to the ground A more responsive feel More ground feedback for more natural movement and agility. When we designed the HFS II, we added a thin BareFoam™ layer to the sole for some extra protection.If you’re a barefoot purist, or an experienced barefoot runner, this layer may be more than you want in your shoe. And indeed, some of our “most barefoot”Xero Shoes fans are the ones who asked us to bring back the HFS Original.HFS II – An Extra Layer of ProtectionThe HFS II has that thin BareFoam™ layer to provide an added bit of protection. If you’re newer to barefoot running or just prefer a different balance between protection and ground feel, then the HFS II can be your go-to shoe, not just for running, but for pretty much any activity.We also added a new, lugged tread tread to make the HFS IImore off-road friendly. If you do a mix of road and off-road running, then the HFS II may suit your needs better.While the HFS II has a slightly thicker stack height than the HFS Original, its sole looks thicker than it actually is. We’ve wrapped the BareFoam™ layer, cup-like, around the upper, giving the HFS II the illusion of a thicker sole while staying true to our barefoot ethos.Choose What’s Best for YOU!The HFS Original and the HFS II both give you barefoot-inspired comfort and performance. They each look great on your feet. And they’re both built to last and backed by our 5000-mile sole warranty.Whichever you choose, you’ll enjoy the benefits of Xero Shoes’ barefoot-inspired DNA. Wider, foot-shaped toe box that lets your toes relax and splay. Zero-drop, non-elevated heel for natural posture, which your joints will appreciate. A thin, flexible sole that lets your feet bend, move, and feel the way nature intended. So lightweight you might forget you’re even wearing them. Some people have asked if HFS means "Happy Face Shoe" or "Happy Feet Shoe" or something else. Whether you prefer the most barefoot feel possible or like the added protection that comes with a thin layer of BareFoam™, there’s an HFS that will give you happy feet and a happy face!
New Year, Better You – Tips for Getting Back to the Gym
Getting into better shape—and feeling better all around—is on a lot of people’s minds this time of the year. And with that (usually) comes getting back to the gym and setting some fitness goals. If you want to achieve the results you’re working toward, the key isn’t just getting back to the gym, but to keep going to the gym… not just for a few weeks, but as part of your routine throughout the year. Some of the reasons that people stop going to the gym just a few weeks into January is because they get sore—or even injured—as they’re trying to improve their fitness. David Freeman, Performance Coach and Xero Shoes partner, has a few tips to help you enjoy a more successful year, to stick with your fitness goals, and to feel good while you’re doing it. 5 Tips for Getting Back to the Gym and Building a Successful Training Habit 1. Start Where You Are As the New Year starts, it’s common for your motivation to be high, which is great. But that high level of motivation can also turn into impatience for the outcome you’re after. And that impatience can lead to you pushing yourself harder than is healthy. David recommends starting where you are. He says, “Transitioning back into training isn’t about doing it all at once. It’s all about consistency. Just like Xero Shoes prioritizes natural movement and reconnecting with the ground, approach your training as a way to reconnect with your body. Begin with foundational movements and gradually build intensity once the mechanics have been mastered.” By focusing on small, steady gains and consistently showing up for your workouts, you’ll build a habit that sticks… and that’s going to deliver far better results than stopping and starting throughout the year because you get discouraged… or worse, injured. 2. Prioritize Form and Function. It’s so tempting to throw yourself into your workouts right from the start, to push yourself to lift more, go hard, and last longer. But that’s a recipe for injury and discouragement. What David recommends instead is to focus on form and function first, saying, “Before diving into heavy loads or complex movements, focus on perfecting your technique. Proper movement patterns not only prevent injuries but also ensure sustainable progress.” So, give yourself a break. Instead of trying to lift more or run further every week, spend the first weeks of the year learning the proper form and movement for your favorite exercises. Then once you have that down, you can start pushing for gains. 3. Listen to Your Body. A flexible mindset is key to building a successful workout habit. It’s helpful to schedule your workouts and to know ahead of time what you plan to accomplish in each session. But it’s equally important to pay attention to how you’re feeling, and to adjust your workouts as needed. David cites listening to your body as a key element to building a long-term workout habit. He says, “Training, like wearing minimalist footwear, is about awareness. If you’re feeling tight, tired, or stiff, incorporate mobility work or active recovery. Over time, this will enhance your performance and minimize your setbacks.” When you have to adjust a workout plan, remind yourself that you’re working smarter, and that will provide better results in the long run. 4. Set Achievable Fitness Goals. Having a big goal is great, but a big goal can take a long time to reach, which can be rough on your sense of motivation and accomplishment. Identify smaller fitness goals along the way that you can hit faster. David recommends you “break your fitness journey into milestones. Whether it’s completing a certain number of reps, increasing the weight on your squat, or mastering a movement, having tangible goals keeps you motivated.” These smaller goals help you see (and celebrate) the progress you’re making which can stoke your desire to hit the next milestone on your path. 5. Create a Strong Foundation. Starting with basic movements and strength helps you build safely into more advanced activities. David says, “Just as Xero Shoes promote natural stability, your training should begin with foundational movements that strengthen your core and balance. Build from there to increase strength and performance.” As you head back to the gym and start building your fitness routine for the year, keep these five tips in mind to create a consistent, healthy habit that will set you up for success. And to get started, try these exercises, recommended by David, to begin building your strong foundation. 4 Exercises to Build Functional Strength and Put You on Track to Achieve Your Fitness Goals Box Jumps Box jumps provide cardiovascular intensity while increasing your body’s ability to move explosively. They also help you work on balance, mobility, and coordination, making them an exercise that gives you layers of benefits. Start with a small box—six inches is a good place to begin if you’ve never done box jumps—and focus on your form and movement. Then, as you perfect your technique, add height in increments. David’s Tip: Focus on landing softly with control, keeping your feet under your hips and your knees slightly bent. Think about "floating" onto the box and minimizing impact… similar to how Xero Shoes encourage a light, natural step. Strength-Building Focus: Use your arms to generate momentum, engage your glutes and quads on the jump, and work on improving height over time while maintaining perfect form. Battle Ropes You’ve seen battle ropes in movie montages, but have you ever tried them? When you do, you’ll quickly discover they provide a full-body workout, challenging your strength and stamina. Battle ropes may look easy, but pace yourself. It might surprise how quickly you start to feel uncoordinated. David’s Tip: Stand grounded with your feet hip-width apart, knees slightly bent, and core engaged. Move the ropes in fluid, powerful waves to work both upper body and cardio simultaneously. Strength-Building Focus: Incorporate intervals—go hard for 20-30 seconds, then rest. Over time, increase the duration or resistance to build endurance and upper-body strength. Barbell Squats A squat is one of the most functional movements there is. You likely perform a squat motion multiple times during your day—any time you pick up something from the floor and lift it, you’re engaging in a squat (or you should be!). Improving your ability to do a squat—and to lift more when you do—increases your core strength and stability. David’s Tip: Keep your chest lifted, core braced, and feet hip-width apart with your toes slightly outturned. Imagine you're gripping the ground with your feet, just as you would in minimalist footwear, to maintain balance and alignment. Strength-Building Focus: Gradually increase the weight, focusing on depth and full range of motion. Add tempo work to improve control and stability. Burpees Burpees combine functional movement with a broad range of motion and explosive energy, strengthening your body in many ways simultaneously. David’s Tip: Move explosively but stay in control. Focus on a solid push up position at the bottom with your chest making contact to the ground and then transitioning to a powerful jump at the top. Strength-Building Focus: Add variations like target jumps to increase intensity. For endurance, aim to increase the number of burpees you can complete in a set time. Focus on Your Foundation First When you focus on building a strong foundation and engaging in natural movement, you’ll set yourself up for more success in the coming year… and you’ll feel better and enjoy every moment more. “By combining these tips with Xero Shoes philosophy of natural movement, you'll develop strength, agility, and endurance that’s both functional and sustainable. Stay grounded, stay consistent, and go get after it!!” - Coach Freeman Natural movement starts with shoes that let your feet move the way nature intended. Check out these favorites for getting back to the gym… The content of this post does not constitute and is not intended to be a substitute for professional medical advice, diagnosis or treatment. Always seek the advice of a physician or other qualified health provider with any questions or concerns you may have about your health or a medical condition.
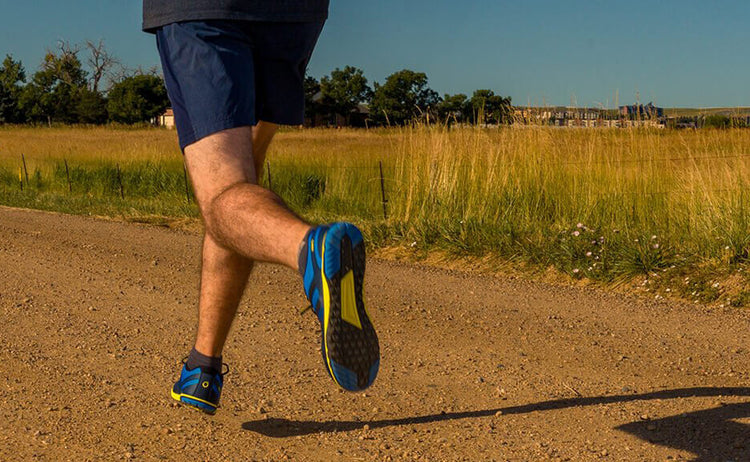
Benefits of Barefoot Running
Barefoot running is more than just a trend. Many runners choose to ditch their shoes simply for the freeing feeling of running in bare feet. But people who run barefoot may enjoy many benefits beyond that. Keep reading to learn the top reasons why you should consider running in your bare feet or making the switch to barefoot shoes. The Benefits of Barefoot Running So what are the advantages of barefoot running? Here are the benefits runners may experience when running barefoot. Benefit 1: Running Barefoot Helps Strengthen Your Feet We know from studies that runners who wear barefoot shoes for walking may strengthen the muscles in their feet, ankles and calves. When you move in bare feet, it stretches and lengthens the small muscles, tendons and ligaments in the foot. Strong foot muscles can enhance your balance and stability and may reduce the risk of injury. It may contribute to improved posture, as well. Benefit 2: With No Shoes, You Can Spread Your Toes Another benefit of going barefoot is being able to spread your toes. Getting out of shoes with pointy toe boxes that squeeze your feet and going barefoot allows for a more natural movement when running or walking. When your toes can splay and spread out naturally, you may experience improvements in balance and stability. Benefit 3: Running Without Shoes Enables Better Footstrike “Footstrike” describes which part of your foot contacts the ground first when you walk or run. Running barefoot provides you with better control of your foot position and helps you contact the ground first with forefoot or midfoot, rather than heel-first, which can lower risk of injury. When you land mid-strike or fore-strike without overstriding, you’re using your legs as springs, helping improve your running form. Benefit 4: Barefoot Running Can Help Improve Posture Our feet are the foundation of our posture. Shoes that squeeze your toes together and have an elevated heel can alter your posture and balance. Ditching your shoes to run barefoot allows you to be flat footed, which helps improve your posture and enables natural running form. Benefit 5: Running in Bare Feet May Reduce Stress on Joints Running frequently can be hard on your joints. Many running shoes have excessive padding, which may result in greater force through your joints. Running barefoot means your foot is flat, potentially reducing the load on the knee joints as you run. This encourages a forefoot or midfoot strike, which helps reduce stress on your knees joints. Can’t Run Barefoot? Try Barefoot Shoes Of course, in many cases, it’s not appropriate or safe to run barefoot. In those situations, barefoot shoes can provide you with the benefits of being barefoot while offering a layer of protection so you can safely feel the ground beneath you as you run. While “barefoot shoes” sounds like a contradiction – you’re either barefoot or in shoes – the idea is that barefoot shoes give you the closest thing to a barefoot experience, while still offering protection when you’re walking, running, or doing any other activity. So, if you’re considering barefoot shoes, it’s helpful to understand the benefits of simply being barefoot because you’ll enjoy similar benefits when wearing barefoot shoes for your runs.Here are a few distinct features of barefoot shoes that mimic running barefoot and how they help runners: Natural-Foot Shape Barefoot shoes have a wider, foot-shaped toe box that does not squeeze your toes. Shoes with a wide toe box give your toes plenty of room to splay, letting your feet spread and relax. This allows your feet to function and move more naturally while running. Zero-Drop Barefoot shoes have “zero drop”, which means the heel-to-toe drop of a shoe is zero – in other words, your heel is level with the rest of your foot. Most traditional running shoes have elevated heels, which causes some parts of your body to be overworked and others to be under worked (also known as, IMBALANCE). Wearing barefoot shoes with zero drop can help improve body alignment. Flexibility Stiff shoes effectively bind the intricate muscles of the foot, preventing the natural movement of the muscles, bones and joints. Barefoot shoes provide more foot flexibility compared to traditional shoes, allowing natural movement of the muscles, bones and joints. Natural Foot Support Barefoot shoes have no arch support which helps to build foot strength naturally. With no excessive padding or support, your feet become their own support system, allowing you to build foot strength the more you wear them. And while this may seem counterintuitive, research shows shoes with arch support isn't all that it’s cracked up to be. When you have something supporting your arch, it can’t actually move through its full range of motion. Because barefoot shoes don’t have arch support, your feet can move freely and naturally, supporting themselves. Whether you have flat feet or high arches, having strong arches is the most important thing. Weaning off shoes with arch support can take time, but you may benefit in the long-run, by building up foot strength. Protective Thin Soles Thin and protective soles allow you to maintain a connection with the ground, making it easier for you to move confidently and strongly. Your feet have 200,000 nerve endings in each sole telling your brain what you're stepping on so it can control your body properly (starting with your feet) to navigate and adjust to the terrain. A thick, heavily cushioned sole mutes this connection between your brain and your feet. A study by Dr. Daniel Lieberman found that “traditional” running shoes with cushioning and elevated heels encourage runners to use a rear-foot strike with greater collision forces compared to the mid- or fore-foot strike and smaller collision forces of barefoot runners. A Word About Transitioning to Barefoot Shoes If you’re thinking of transitioning to barefoot running, treat it like going to the gym. Just as you would gradually increase your weight or volume the more you workout, gradually increase the amount of time you spend running in your barefoot shoes. And remember, your form is critical for long-term success. Closing Out: Benefits of Barefoot Running There are many health benefits to barefoot running. Whether you’re running in bare feet, or wearing barefoot shoes, you may enjoy the potential benefits of better form, and stronger feet, ankles and calves. Barefoot shoes allow you to run and move freely, so you can “Live Life Feet First”. Intrigued? Shop our men’s and women’s footwear selection here to find running shoes. The content of this post does not constitute and is not intended to be a substitute for professional medical advice, diagnosis or treatment. Always seek the advice of a physician or other qualified health provider with any questions or concerns you may have about your health or a medical condition.

Find the Shoe That Moves Like You Do.
Take the Quiz